HOW TO: 5TH GEN: Install JDM Door/Window Visors
Posted: Fri Feb 19, 2021 1:25 am
DISCLAIMER: Canadian Prelude Club and I (infamouz) are not responsible/accountable for any errors, damage, unwanted results that you may come across or experience! DO THIS AT YOUR OWN RISK!
Read the whole post before attempting this mod. Make sure to clear all and any questions you may have to accomplish the desired result.
Benefits of this mod:
- Completes the look of the car – aesthetics
- Air Circulation (you’re able to open up the window just a bit during times of rain, snow, etc.)
- JDM factor
Materials Needed:
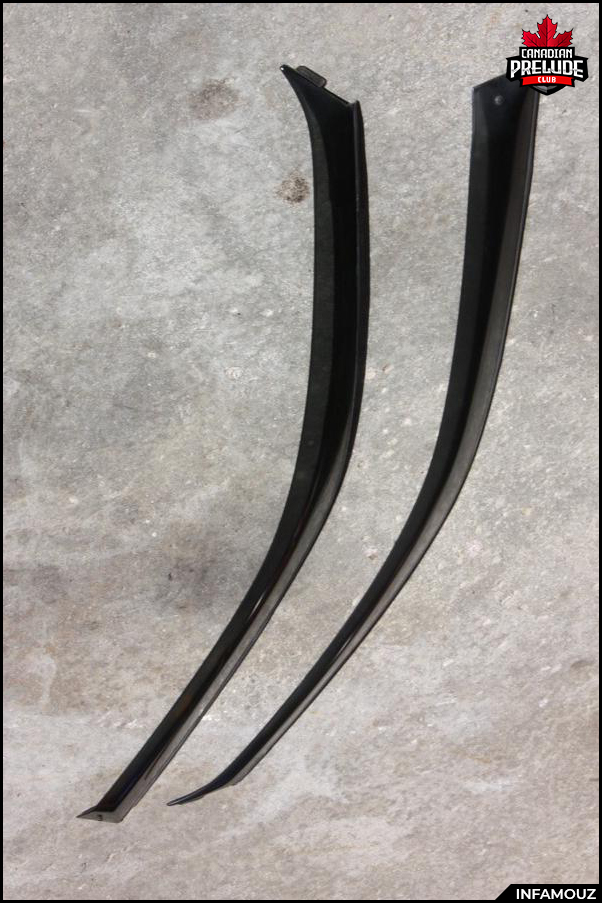
- 2x Door Visors (JDM option)
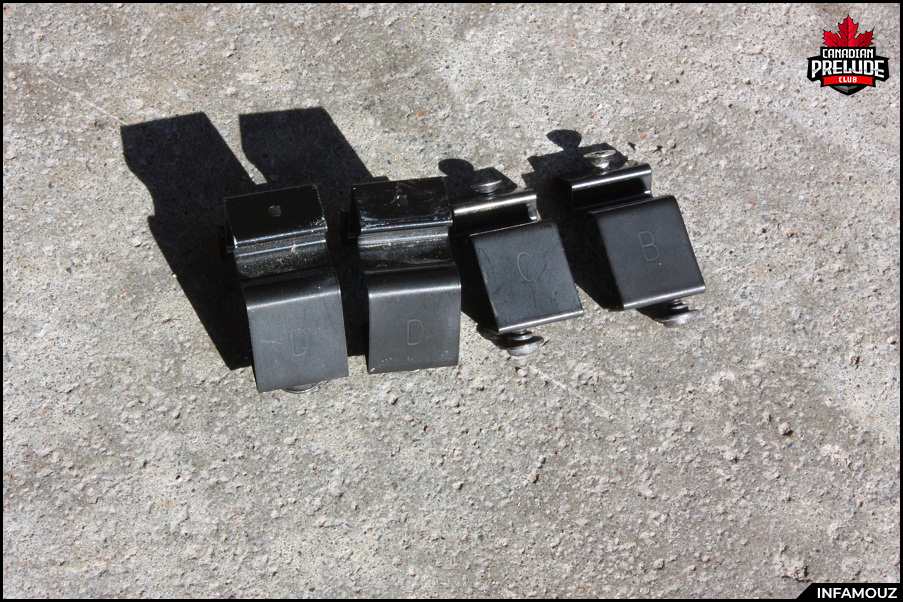
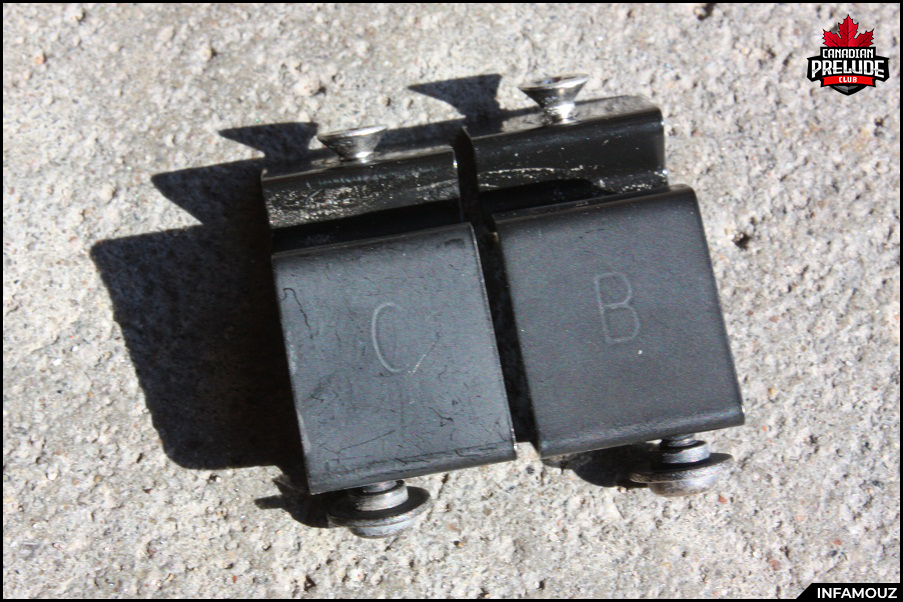
- 2x “B” brackets – comes with 2 silver screws for each bracket
- 2x “C” brackets – comes with 2 silver screws for each bracket
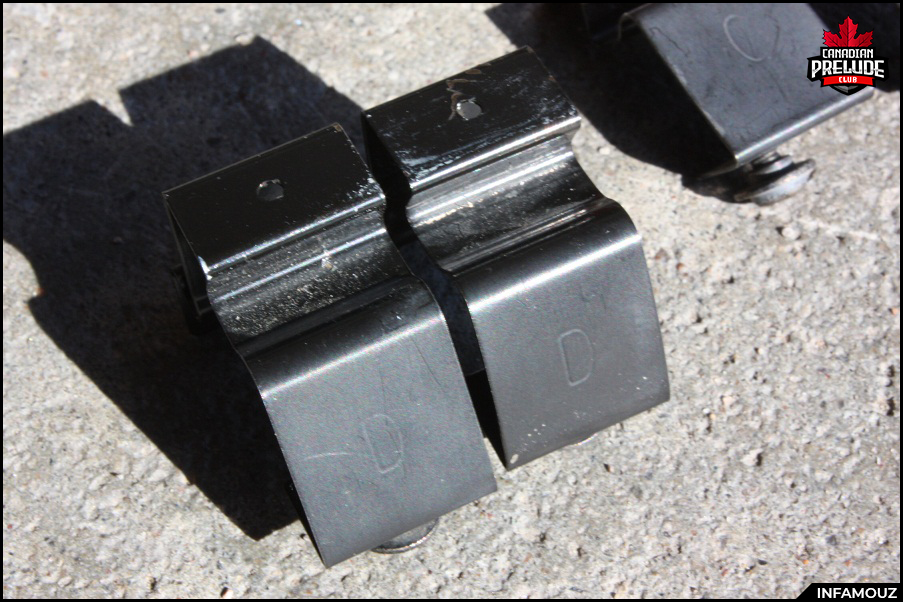
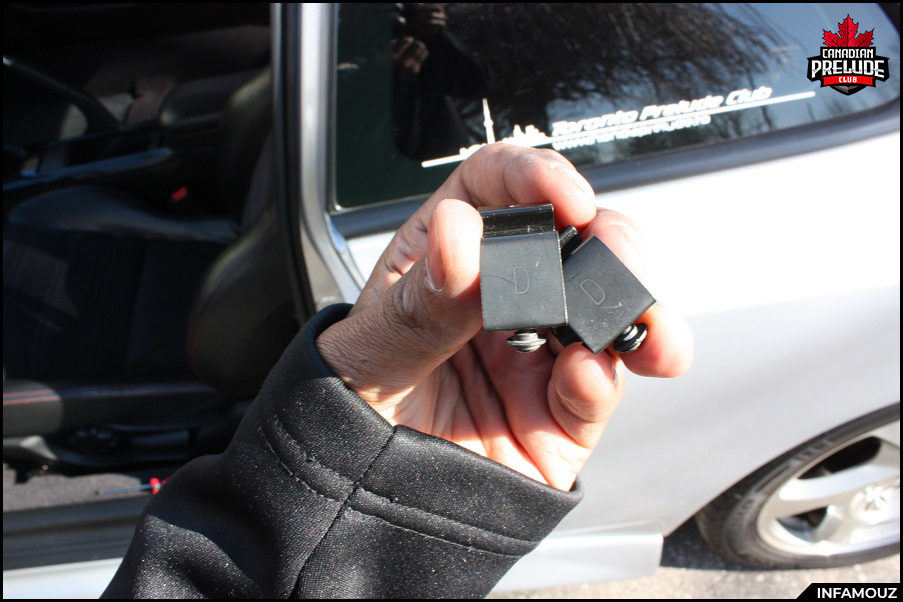
- 4x “D” brackets – comes with 1 silver screw for each bracket
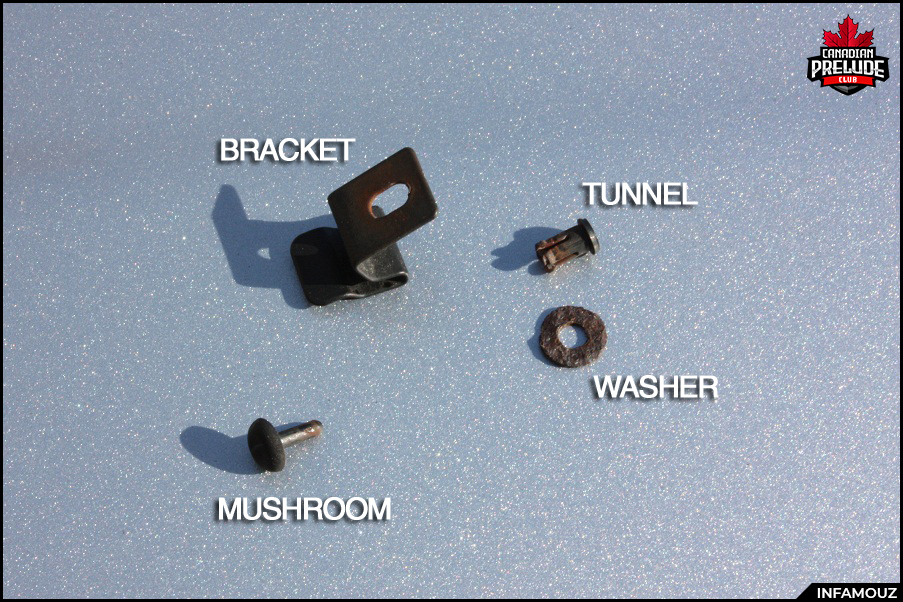
- 2x “A” brackets – comes with washer and push-in clip set (mushroom shaped)
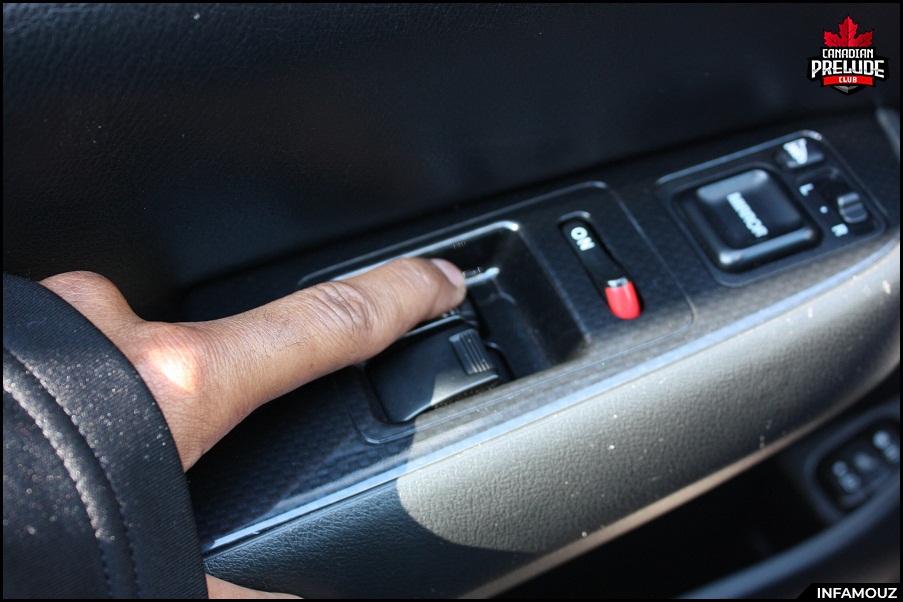
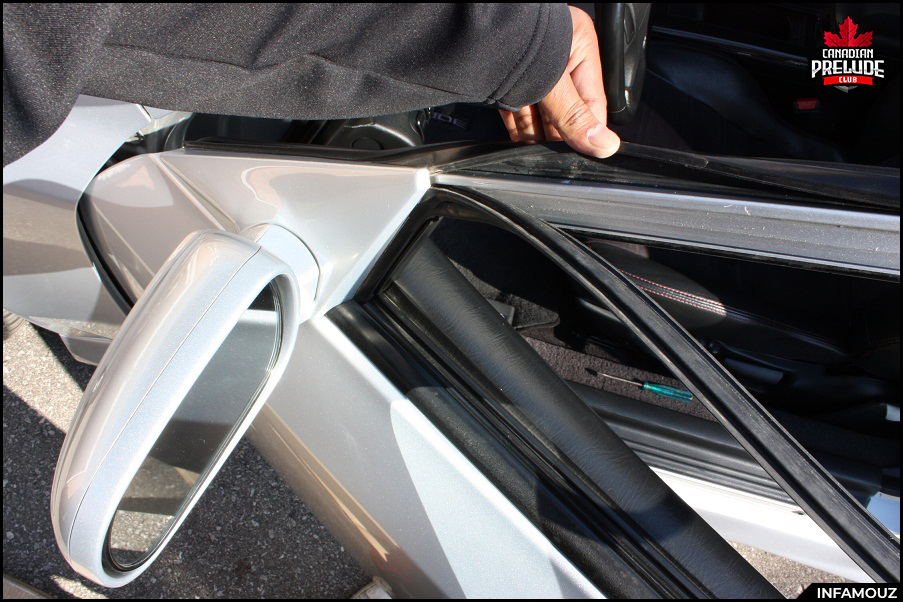
1. Lower the window half way or all the way down. This will give you access to the weather seal/rubber molding around the door frame.
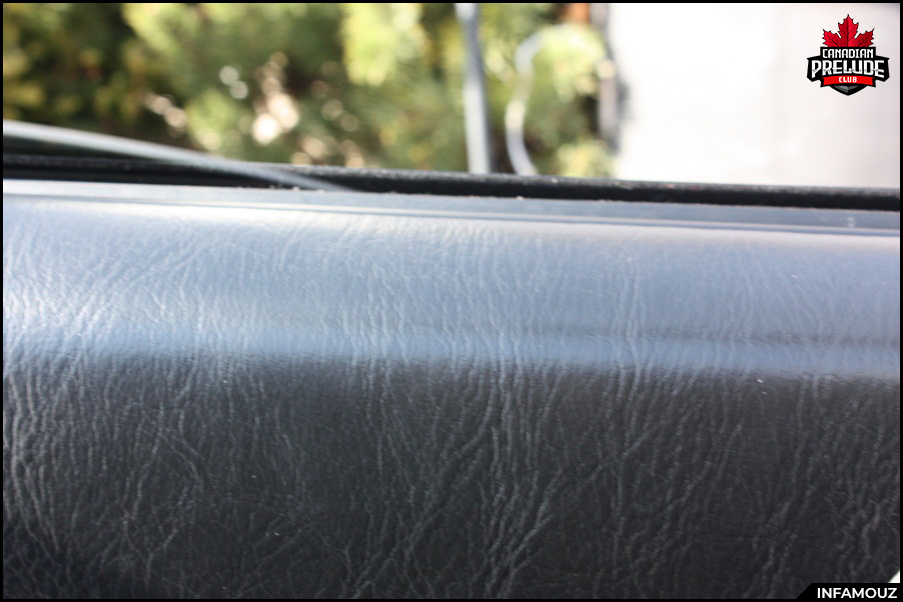
2. Take a closer look at the weather seals – there are two – one going around the exterior of the door frame and another one for the window. These will be called door seal and window seal respectively for the sake of this write up.
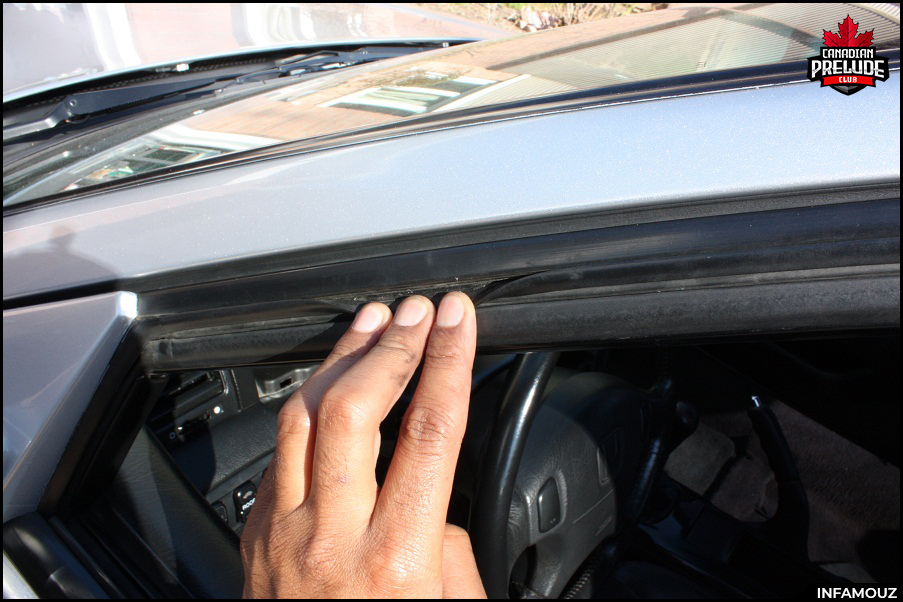
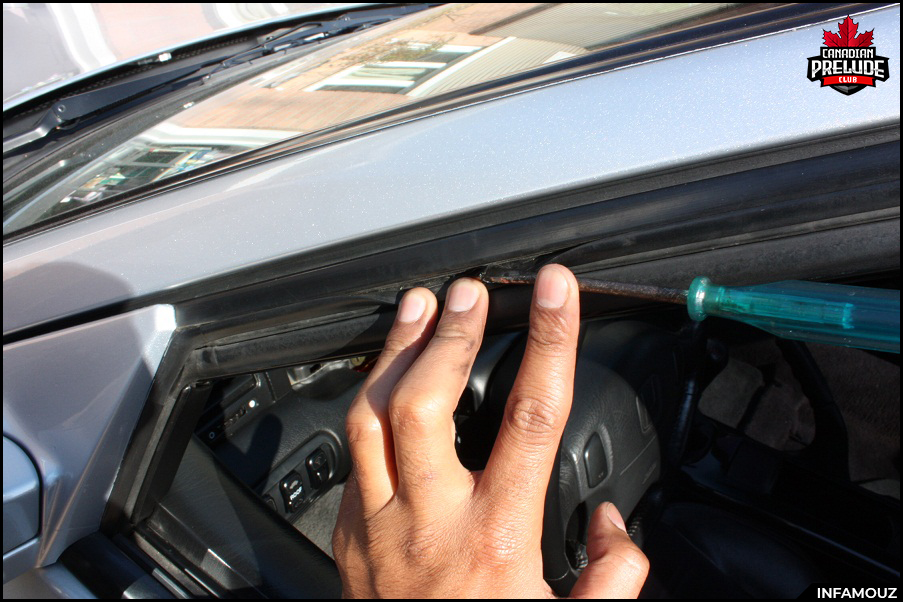
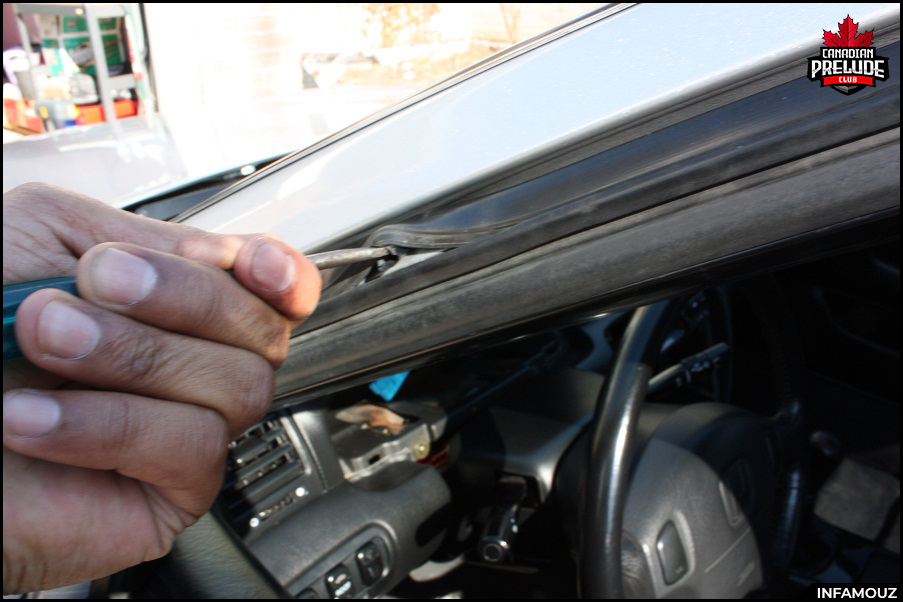
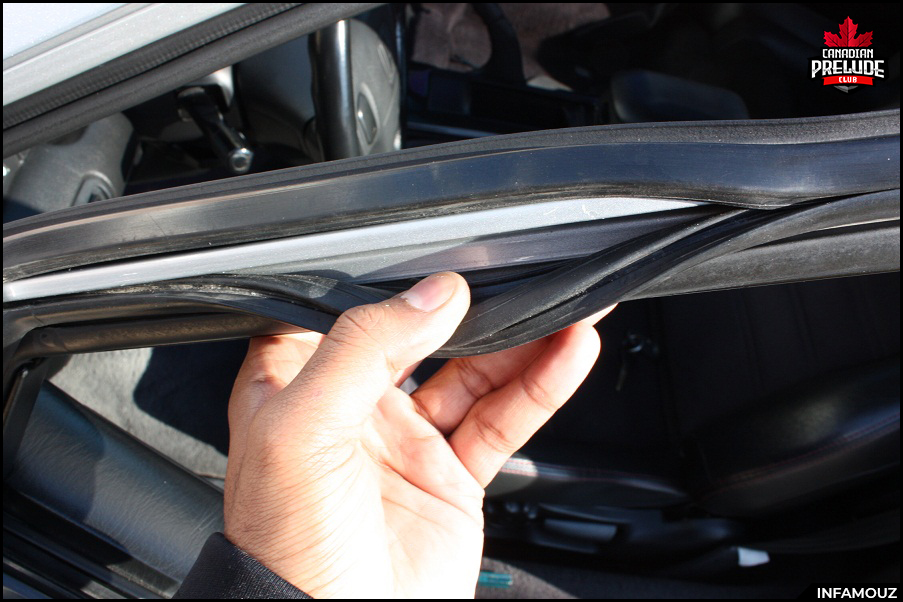
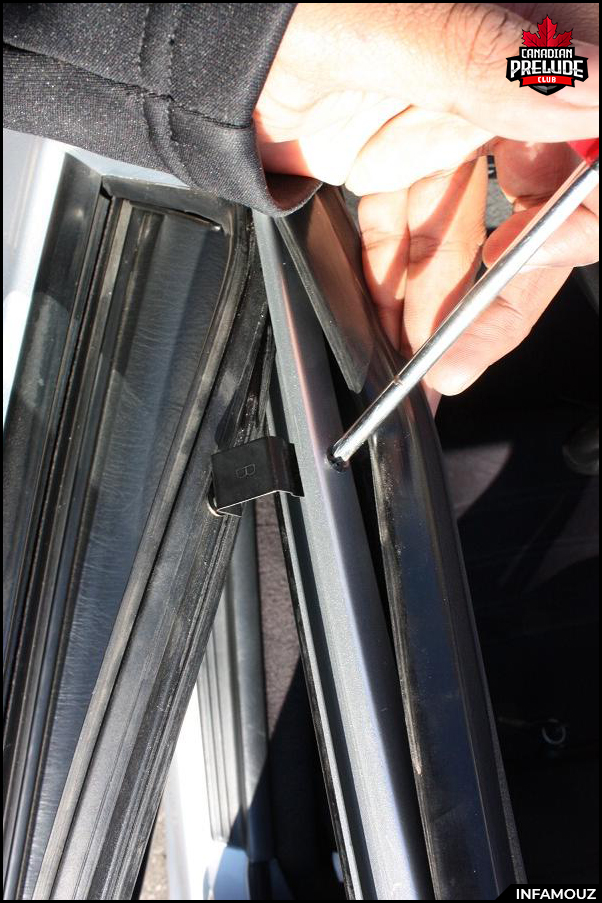
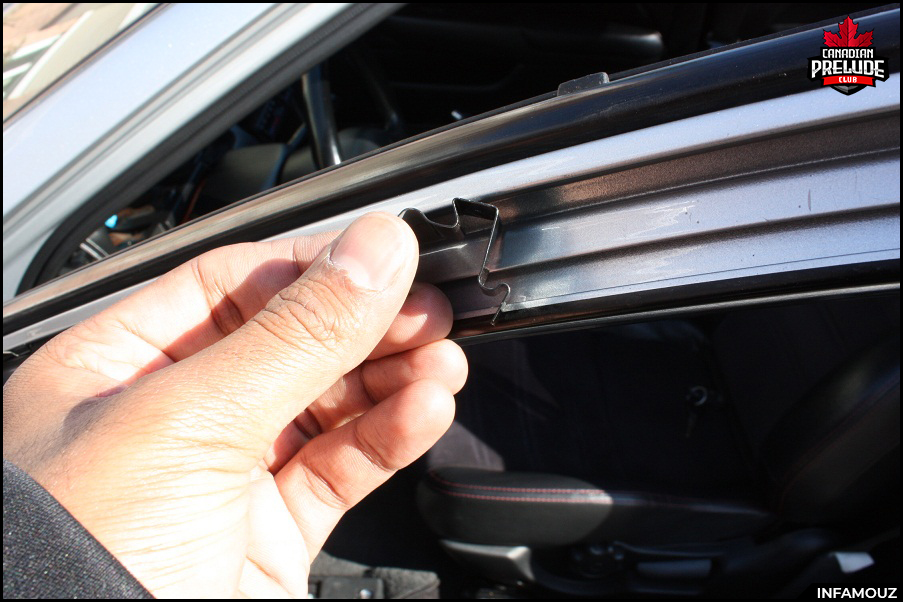
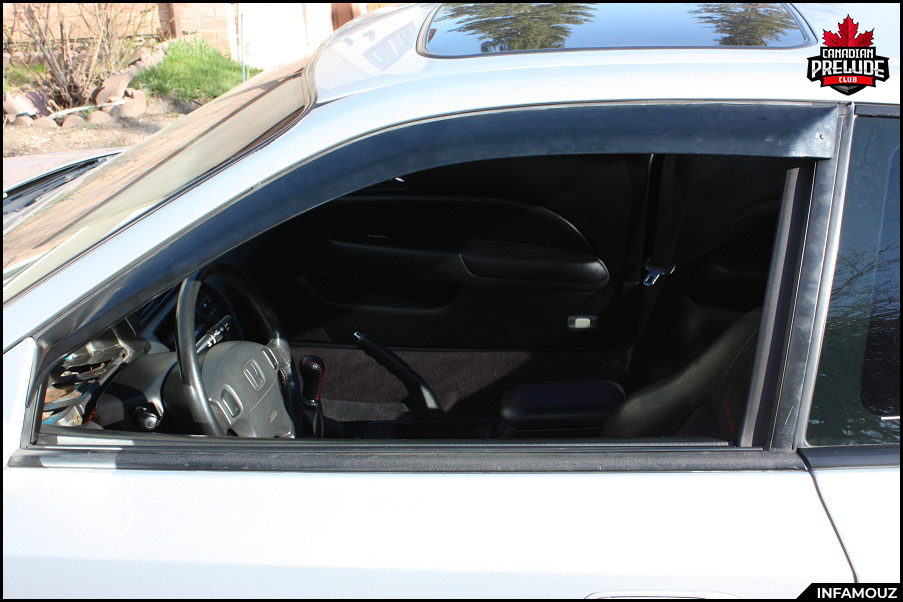
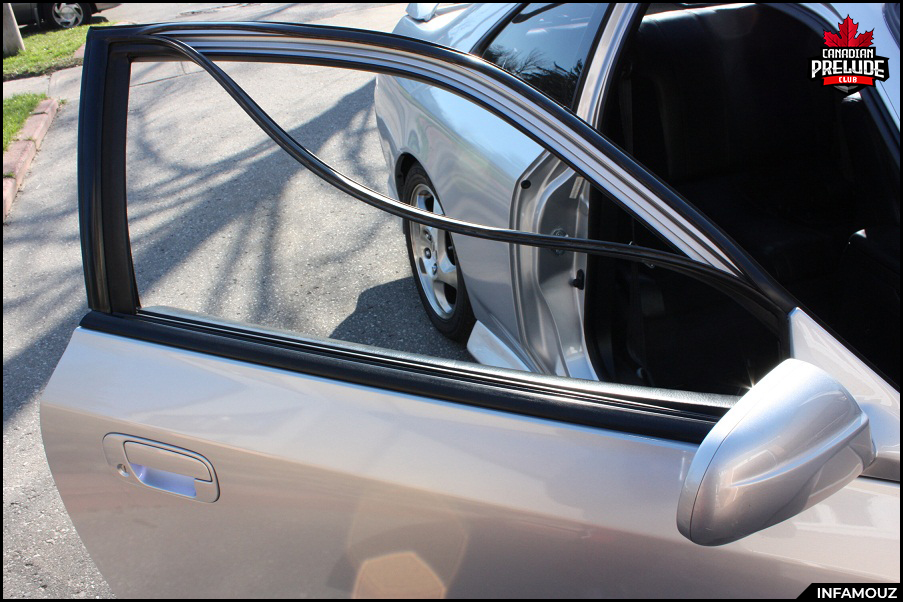
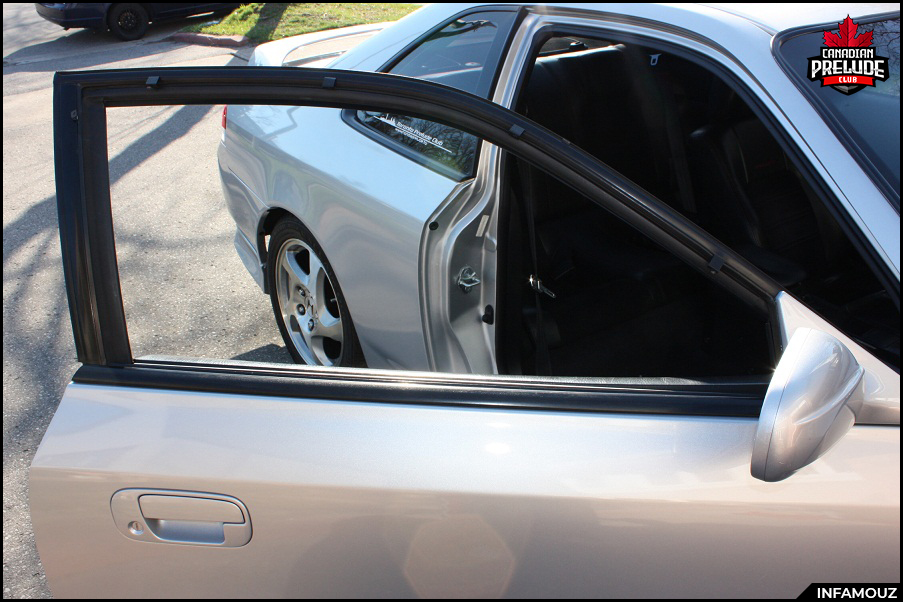
Pull on the window seal with your fingers to create a gap and insert a flat head screwdriver in the slot. You will notice immediately that the door seal is “sealed” into the window seal which is then pushed into the groove on the door frame. Pry the door seal so that it comes out of the groove and the window seal will disconnect from it. Once it does, pry the entire window seal with your hand all the way to the end (B-pillar) and just leave it hanging – see pics below.
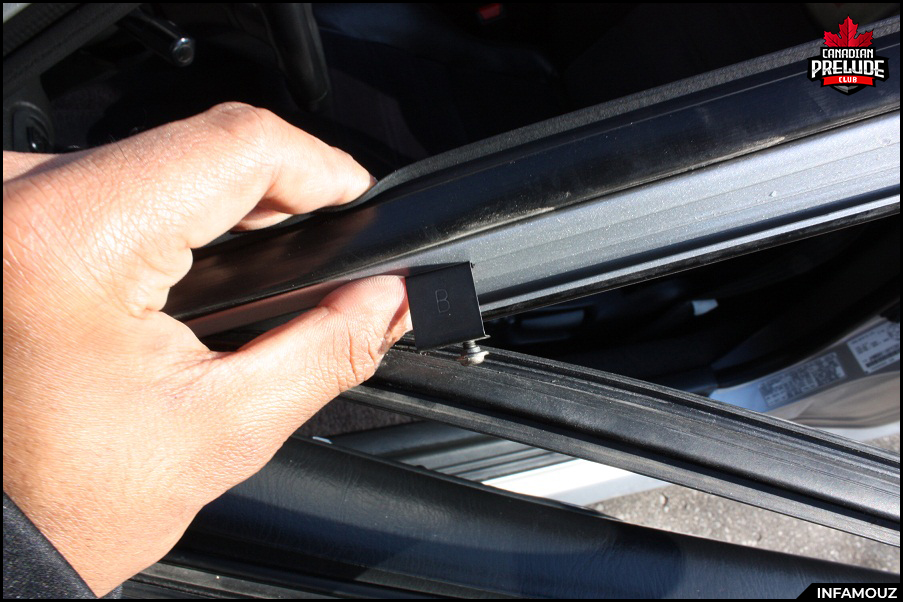
3. Install the “B” bracket. 3” away from the side mirror, you’ll come across a hole on the door frame. Use the respective screw provided to install the bracket.
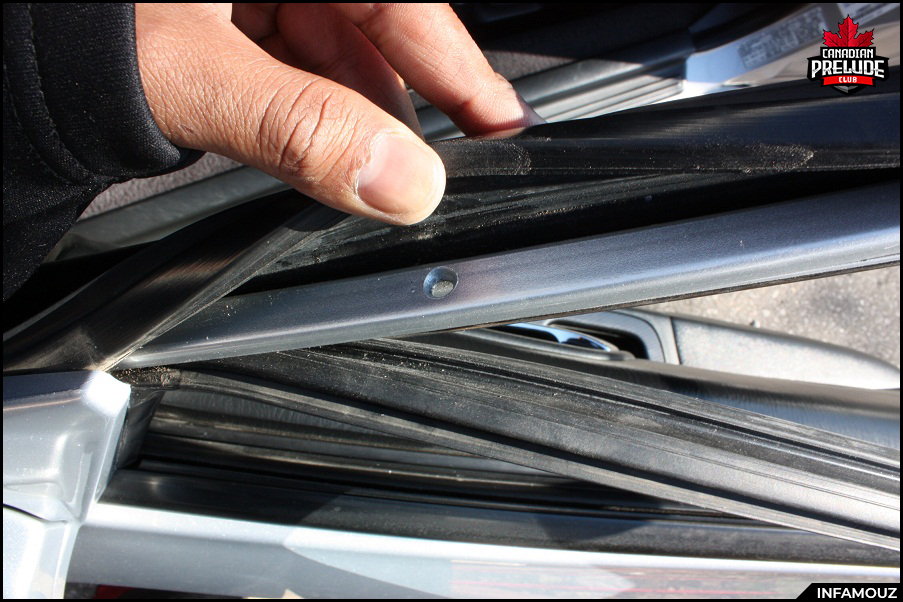

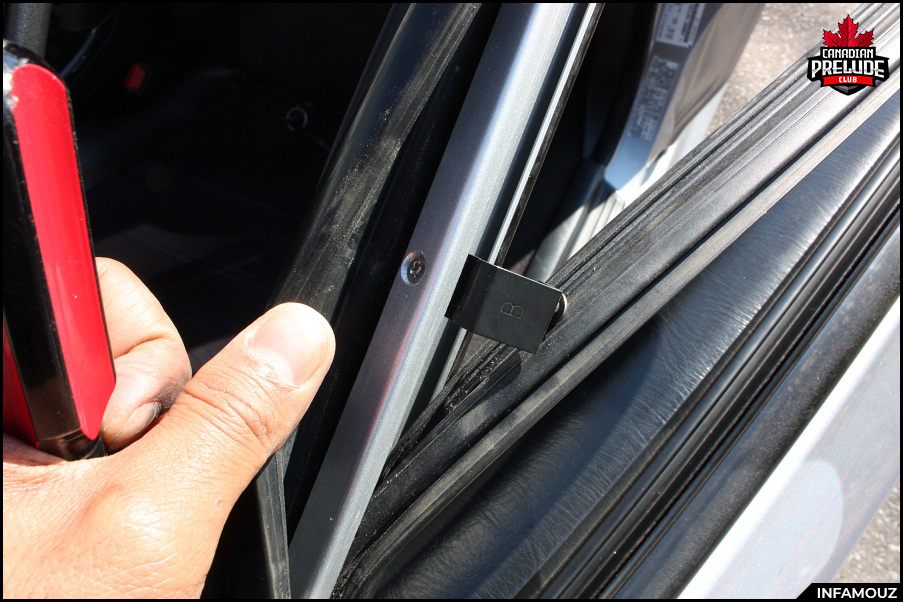
4. Install the “C” bracket. 3” away from the end of the door frame, you’ll come across another hole on the door frame. Use the respective screw provided to install the bracket.

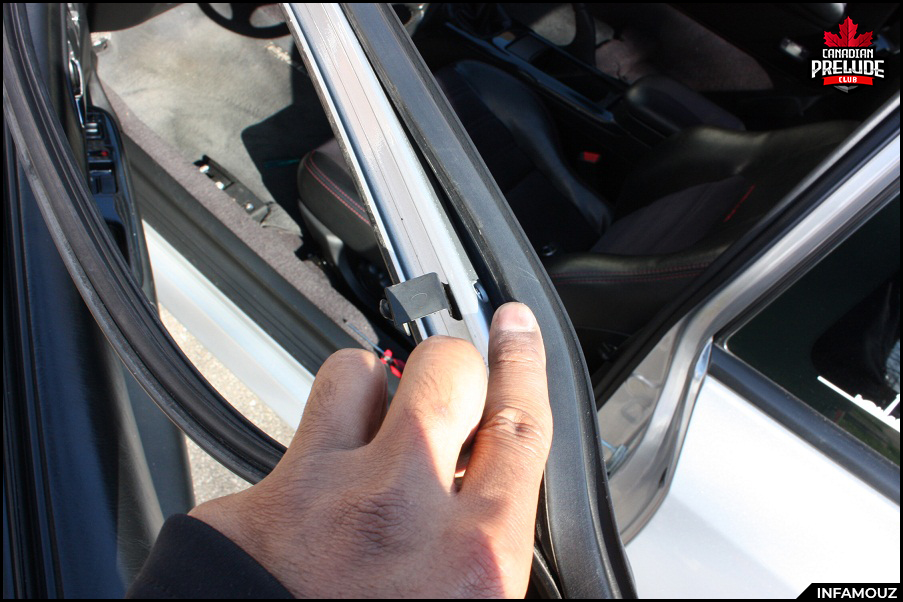
5. Install the “D” brackets. Unlike the “B” and “C” bracket, these particular brackets are held in place by the door seal. You will have to place the respective door visor and align the holes to the installed brackets at this point. Either using a pencil or your finger, mark where the “D” brackets should be installed. Place the brackets in their spots and push in the door seal to the hold them in place. You can adjust them ~3mm after the door seal is pushed back in. Don’t worry the screw holes on the visors are big enough to compensate for a few millimeters.
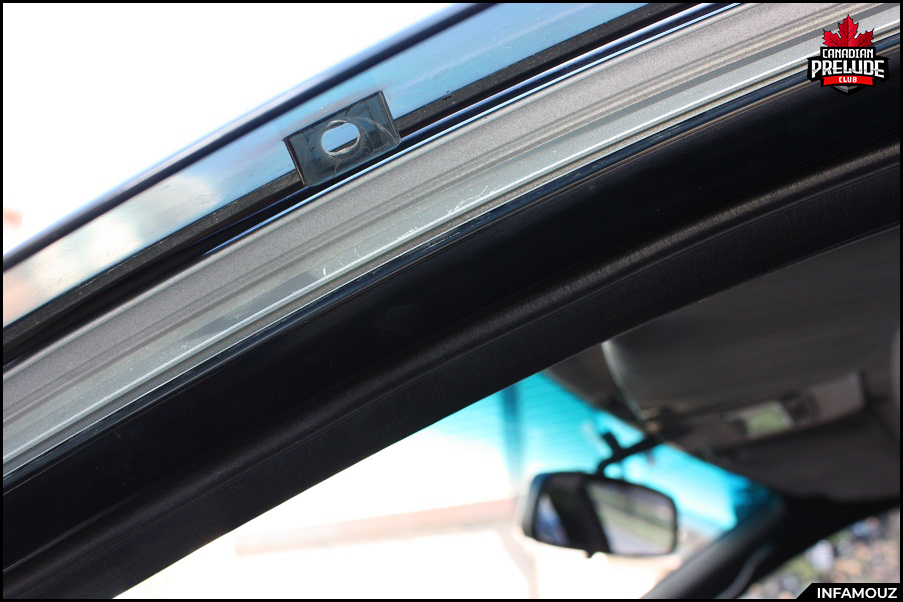
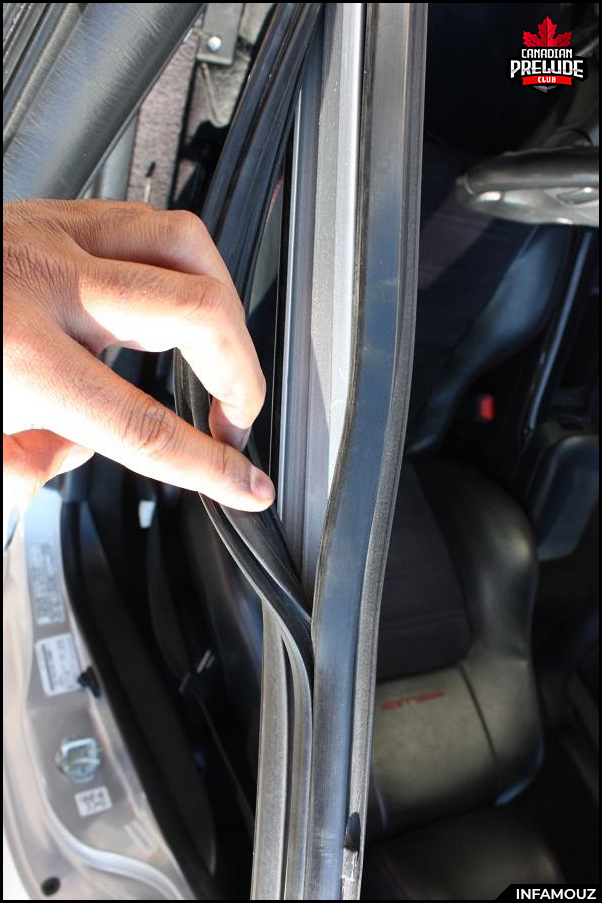
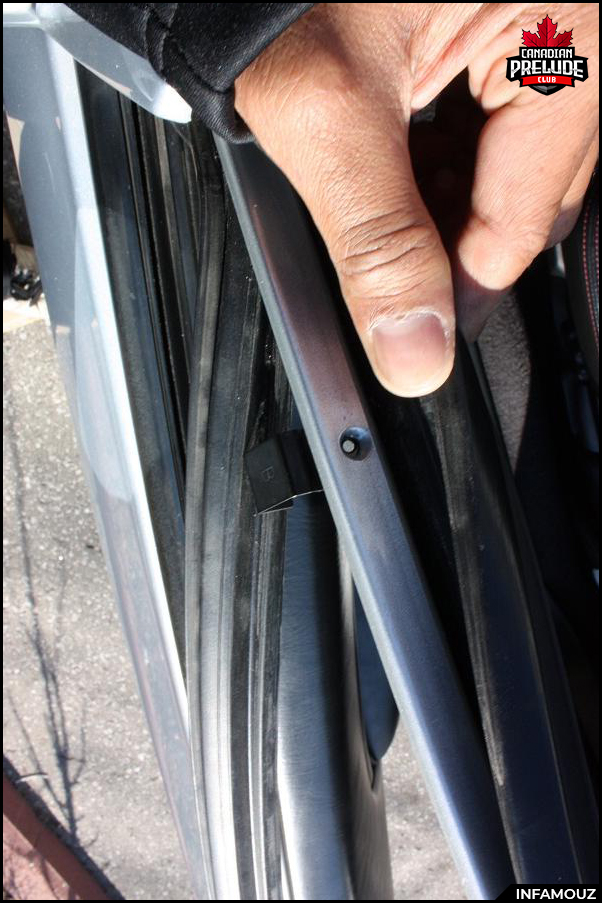
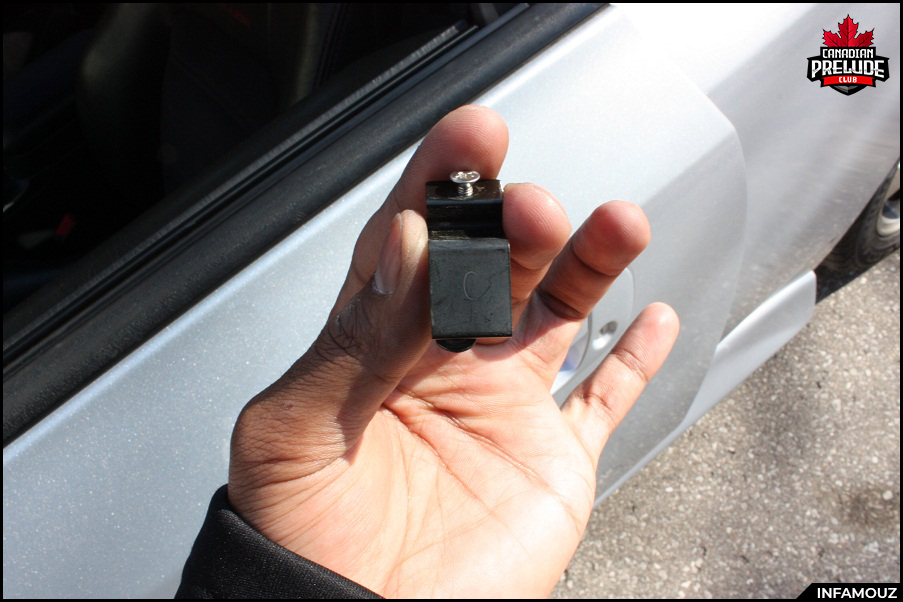
6. Install the “A” bracket. It’s mounted onto the metal frame near the edge of the door (B-pillar). Apply 2” of black electrical tape where the bracket is to be installed. The metal frame and the bracket can scrape one another, which eventually results in paint being removed, which then gives way for rust. Using the door visor, roughly mark where the “A” bracket should be installed based on the placement of the hole. Install the bracket at the respective spot. Push/install the window seal back into place. This is what it should look like at this moment.

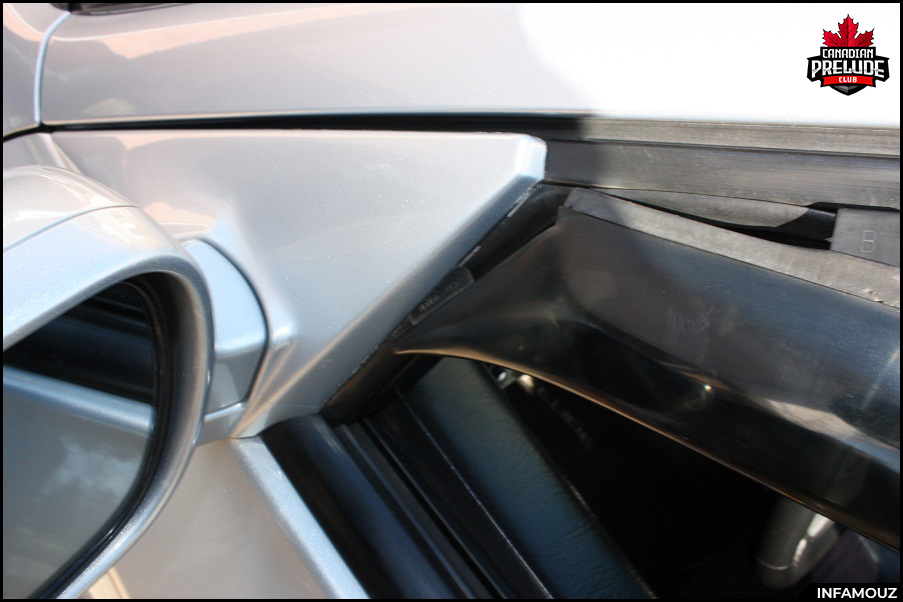
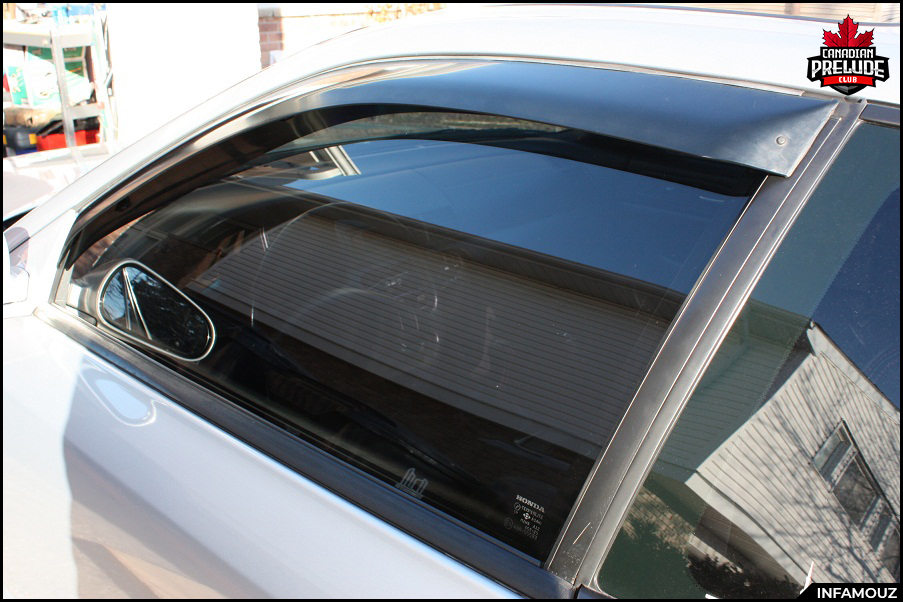
7. Install the door visor. There is a tab at the very tip that says “HONDA >PC” which slides behind the side mirror. Once in place, use the provided screws to attach the visor to the brackets. Should be hand tight – do not over tighten it as you may break the plastic.
8. Now for mounting it to the “A” bracket.MAKE SURE TO NOT LOSE ANY OF THESE COMPONENTS! This is probably the trickiest step – carefully hold the washer underneath the bracket and push the tunnel piece from the outside through the visor and then through the washer. Make sure they’re “connected” and it’s secure before you insert the “mushroom”/clip piece through to seal the connection. (if you happened to lose any of these components during the installation process, apply 3M double sided tape to the visor and secure it to the door frame).

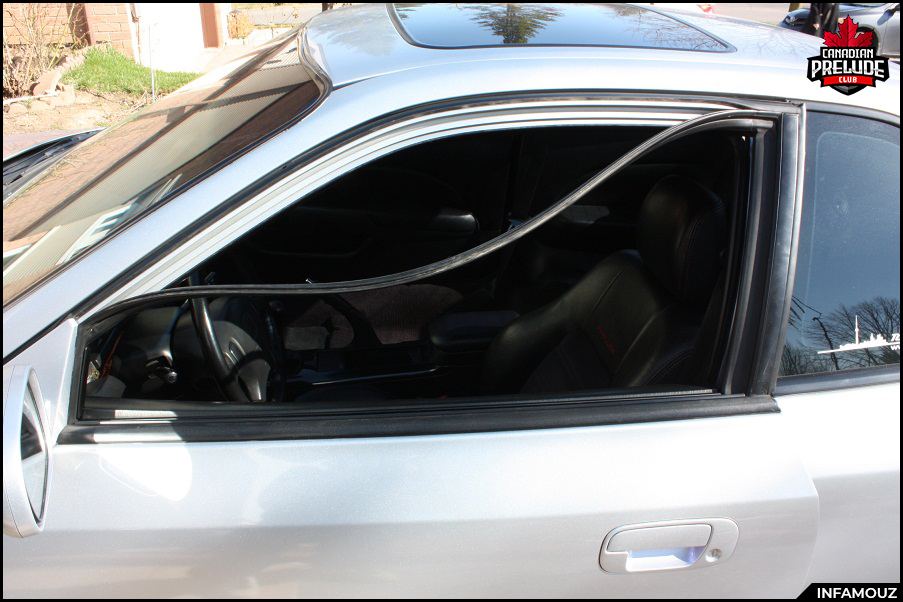
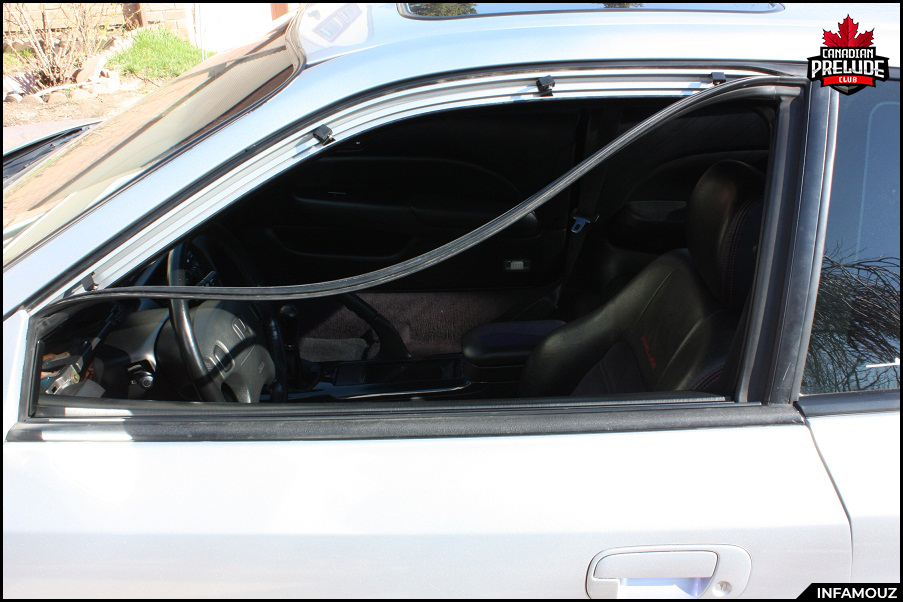
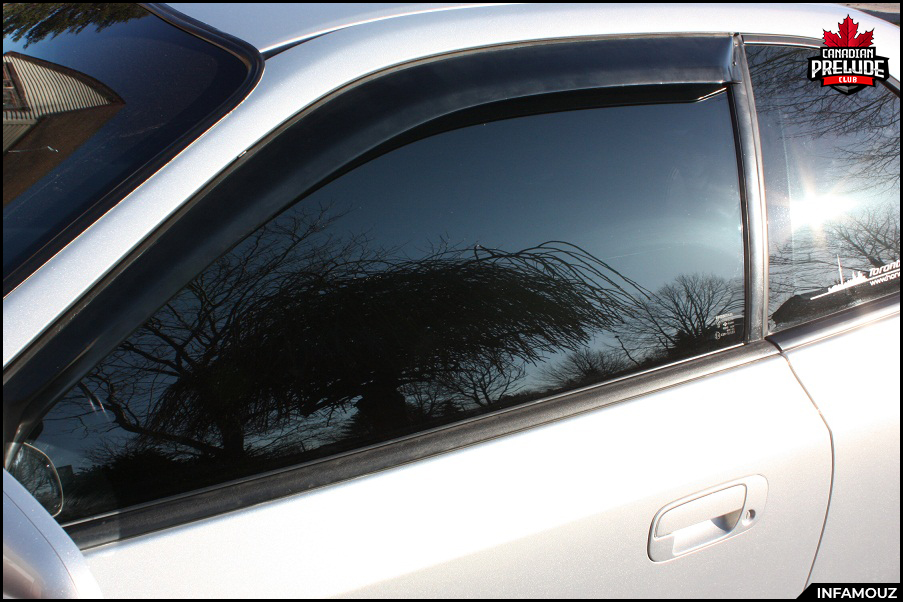
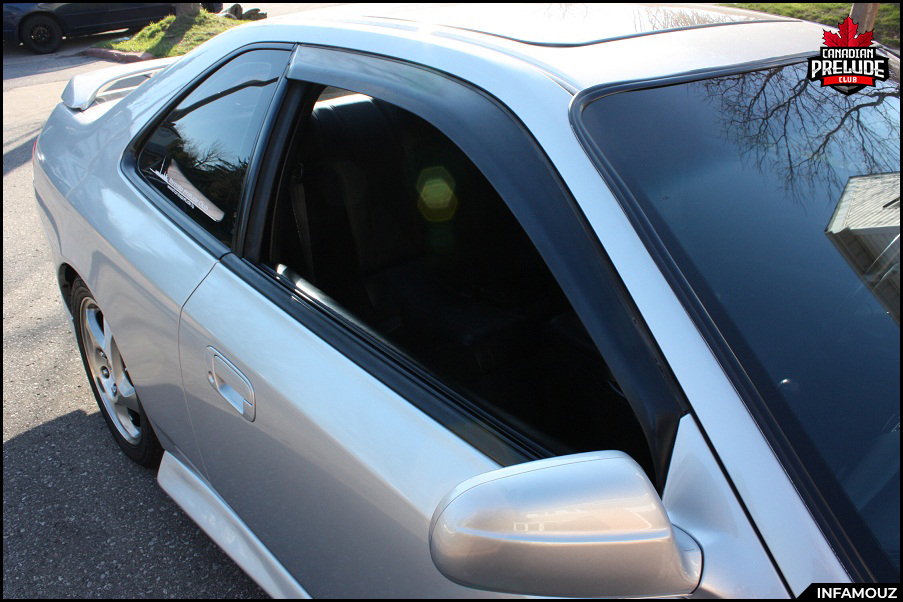
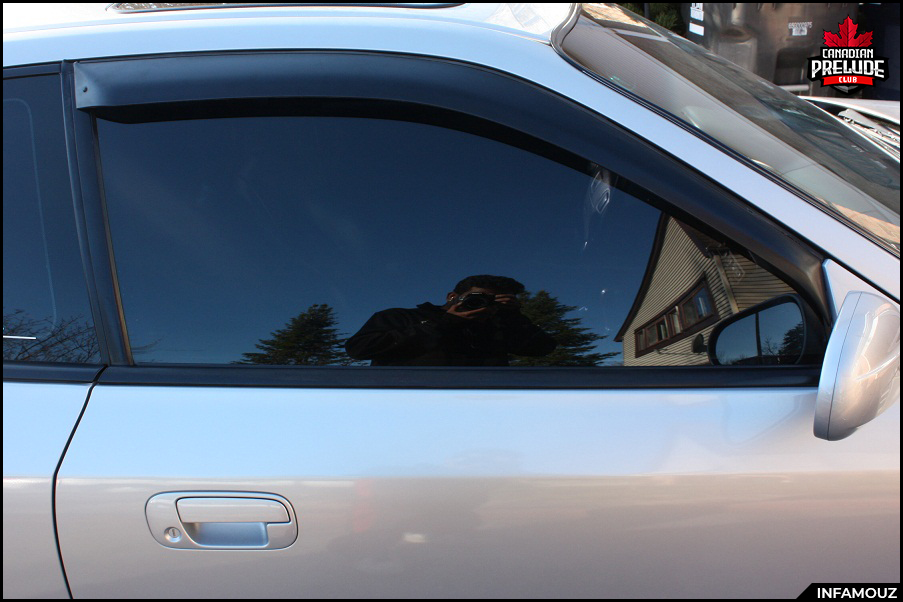
9. Here’s the finished result for the driver side.
10. Repeat the same steps (1 – 9) for the passenger side.
Enjoy the visors!
Read the whole post before attempting this mod. Make sure to clear all and any questions you may have to accomplish the desired result.
Benefits of this mod:
- Completes the look of the car – aesthetics
- Air Circulation (you’re able to open up the window just a bit during times of rain, snow, etc.)
- JDM factor
Materials Needed:
- 2x Door Visors (JDM option)
- 2x “B” brackets – comes with 2 silver screws for each bracket
- 2x “C” brackets – comes with 2 silver screws for each bracket
- 4x “D” brackets – comes with 1 silver screw for each bracket
- 2x “A” brackets – comes with washer and push-in clip set (mushroom shaped)
1. Lower the window half way or all the way down. This will give you access to the weather seal/rubber molding around the door frame.
2. Take a closer look at the weather seals – there are two – one going around the exterior of the door frame and another one for the window. These will be called door seal and window seal respectively for the sake of this write up.
Pull on the window seal with your fingers to create a gap and insert a flat head screwdriver in the slot. You will notice immediately that the door seal is “sealed” into the window seal which is then pushed into the groove on the door frame. Pry the door seal so that it comes out of the groove and the window seal will disconnect from it. Once it does, pry the entire window seal with your hand all the way to the end (B-pillar) and just leave it hanging – see pics below.
3. Install the “B” bracket. 3” away from the side mirror, you’ll come across a hole on the door frame. Use the respective screw provided to install the bracket.
4. Install the “C” bracket. 3” away from the end of the door frame, you’ll come across another hole on the door frame. Use the respective screw provided to install the bracket.
5. Install the “D” brackets. Unlike the “B” and “C” bracket, these particular brackets are held in place by the door seal. You will have to place the respective door visor and align the holes to the installed brackets at this point. Either using a pencil or your finger, mark where the “D” brackets should be installed. Place the brackets in their spots and push in the door seal to the hold them in place. You can adjust them ~3mm after the door seal is pushed back in. Don’t worry the screw holes on the visors are big enough to compensate for a few millimeters.
6. Install the “A” bracket. It’s mounted onto the metal frame near the edge of the door (B-pillar). Apply 2” of black electrical tape where the bracket is to be installed. The metal frame and the bracket can scrape one another, which eventually results in paint being removed, which then gives way for rust. Using the door visor, roughly mark where the “A” bracket should be installed based on the placement of the hole. Install the bracket at the respective spot. Push/install the window seal back into place. This is what it should look like at this moment.
7. Install the door visor. There is a tab at the very tip that says “HONDA >PC” which slides behind the side mirror. Once in place, use the provided screws to attach the visor to the brackets. Should be hand tight – do not over tighten it as you may break the plastic.
8. Now for mounting it to the “A” bracket.MAKE SURE TO NOT LOSE ANY OF THESE COMPONENTS! This is probably the trickiest step – carefully hold the washer underneath the bracket and push the tunnel piece from the outside through the visor and then through the washer. Make sure they’re “connected” and it’s secure before you insert the “mushroom”/clip piece through to seal the connection. (if you happened to lose any of these components during the installation process, apply 3M double sided tape to the visor and secure it to the door frame).
9. Here’s the finished result for the driver side.
10. Repeat the same steps (1 – 9) for the passenger side.
Enjoy the visors!