HOW TO: 5TH GEN: Remove/Install Seats (Swap Covers/Skins)
Posted: Mon Mar 01, 2021 10:02 pm
DISCLAIMER: Canadian Prelude Club and I (infamouz) are not responsible/accountable for any errors, damage, unwanted results that you may come across or experience! DO THIS AT YOUR OWN RISK!
Read the whole post before attempting this mod. Make sure to clear all and any questions you may have to accomplish the desired result.
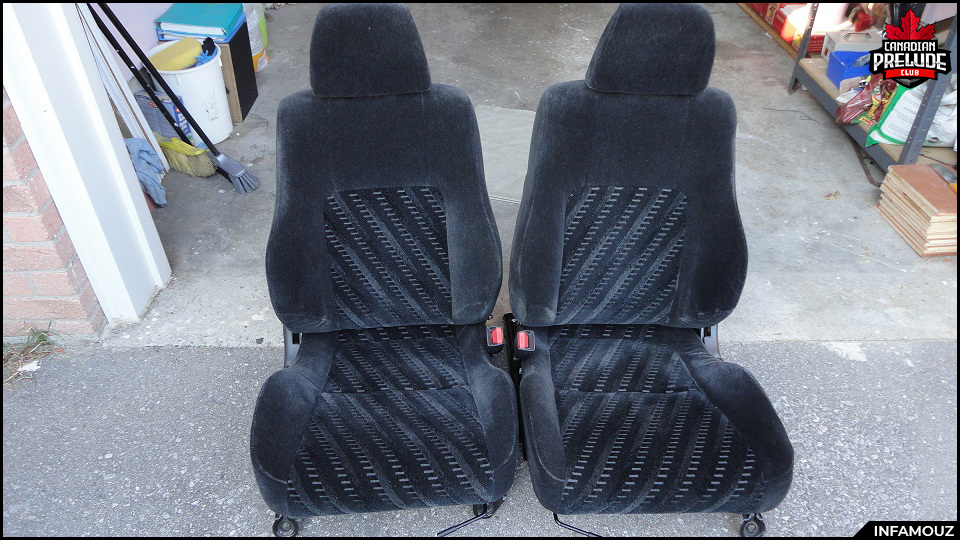
I bought a full set of JDM Type-S Seats and wanted to keep the driver side adjustable pan and heated seat. Since Japanese vehicle didn’t come with heated seats, I had to remove the skins and swap it over my OEM seats.
This write up would help individuals who are either planning on removing/installing seats covers or adding in the heated seat elements.
NOTE: These seats are out of a Canadian Prelude. Therefore, you will encounter some pictures that will showcase extra wiring for heated seat elements along with the elements themselves.
Materials needed:
- Seat Covers (Fronts &/or Rears)
- Ratchet
- 10mm, 12mm & 14mm socket
- Flat head screw driver
- Philips screw driver
- Wire cutter or Pliers
- Zip ties
- Patience
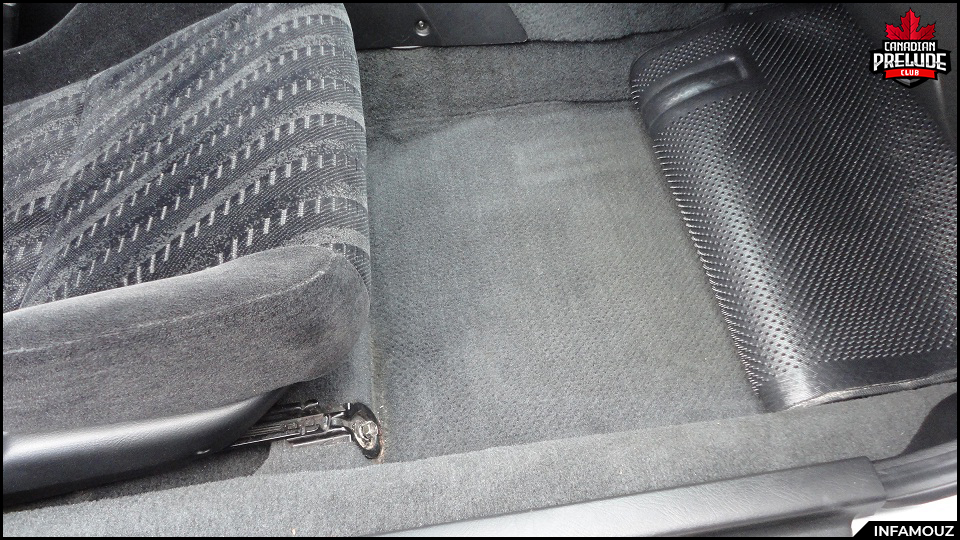
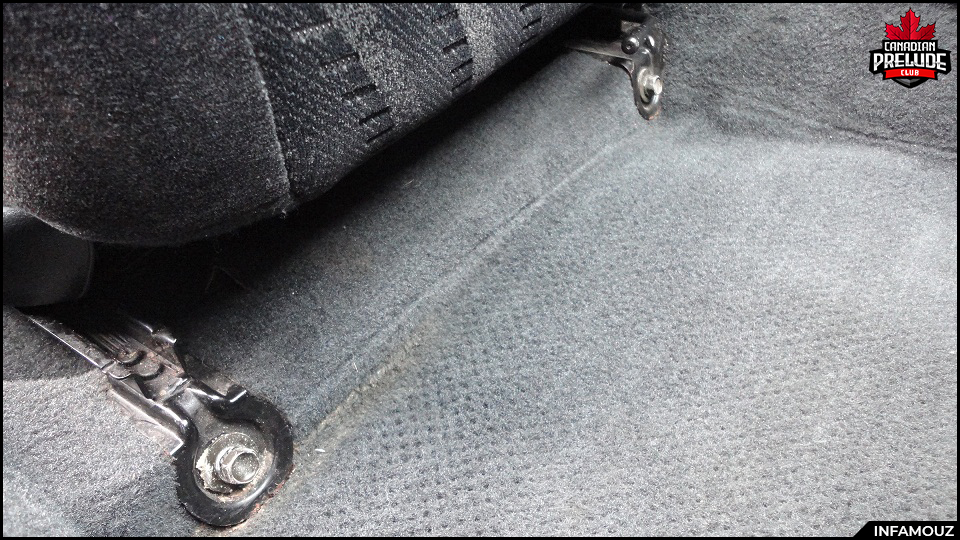
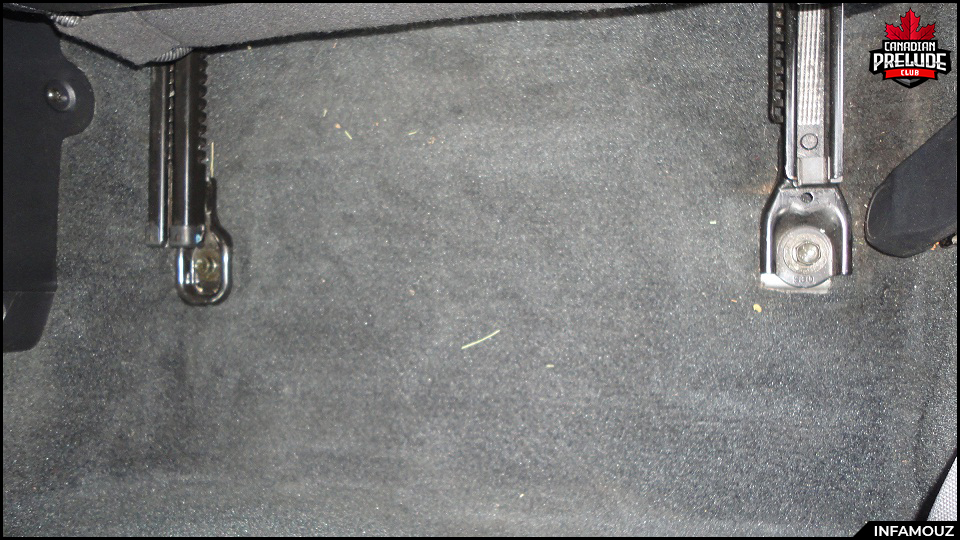
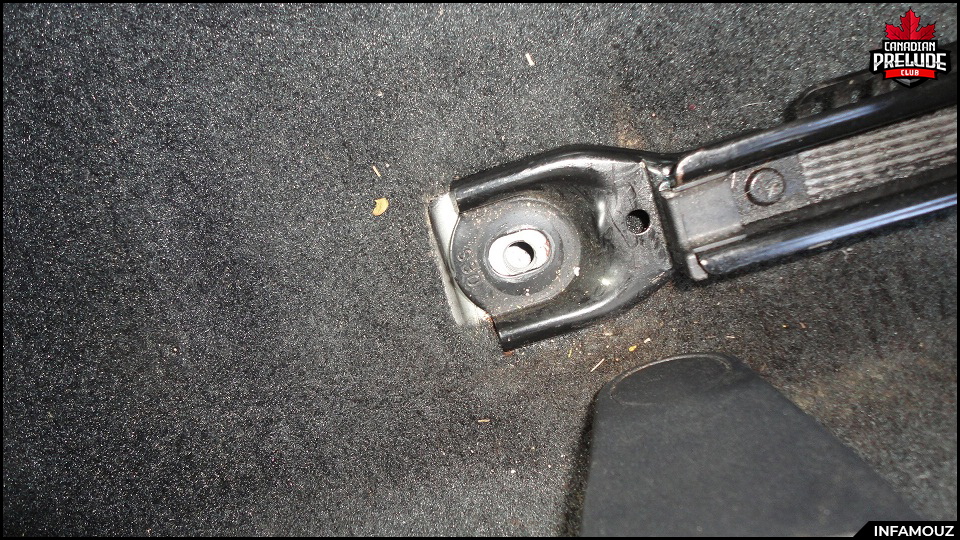
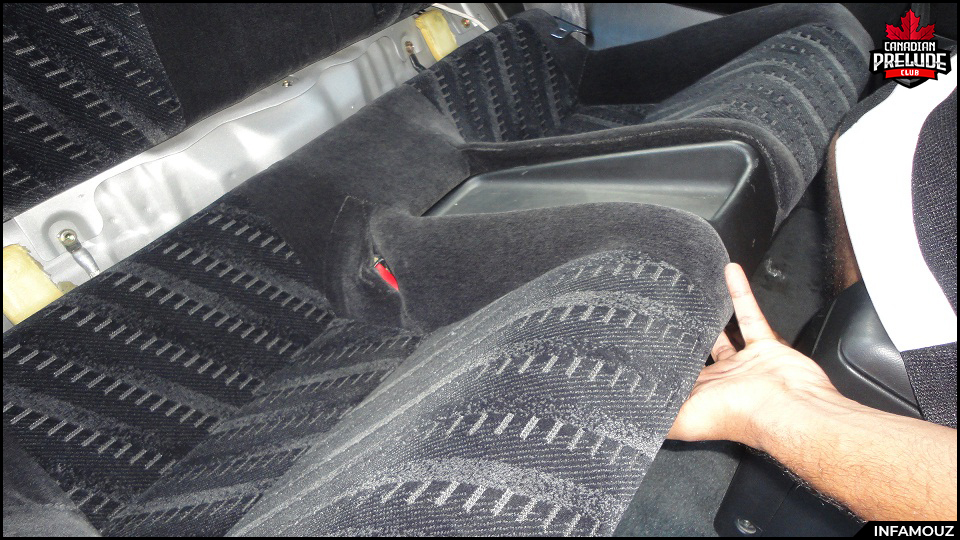
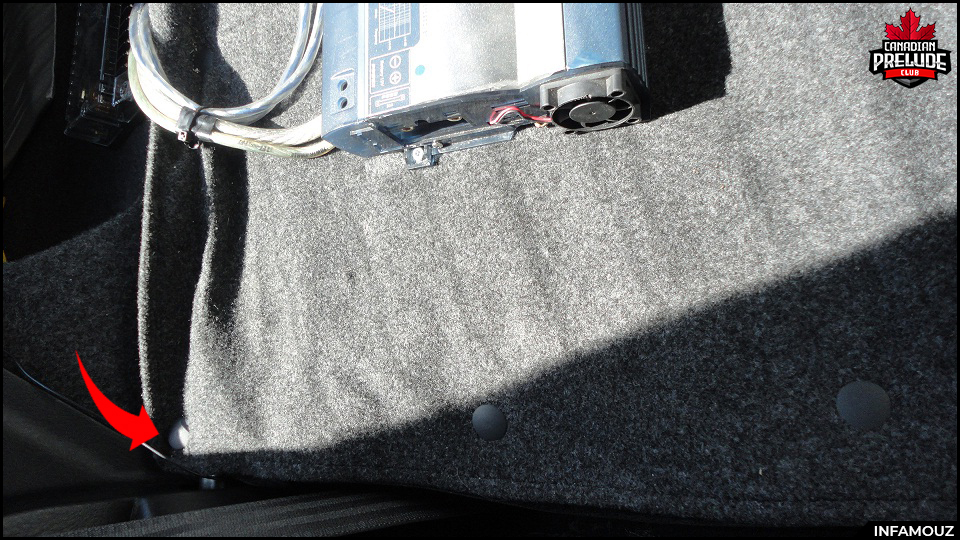
1. Remove the front seats. They’re held in by 4 bolts (2 front, 2 back) – 14mm. Lift up the carpet to expose the front bolts. The rear bolts will have a plastic cover on top. Use a flat head screw driver to pry it off.
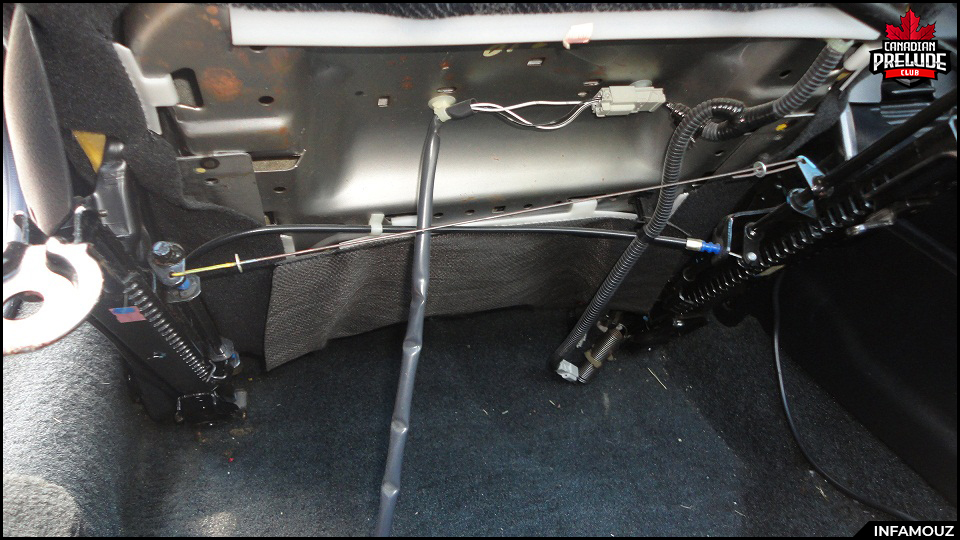
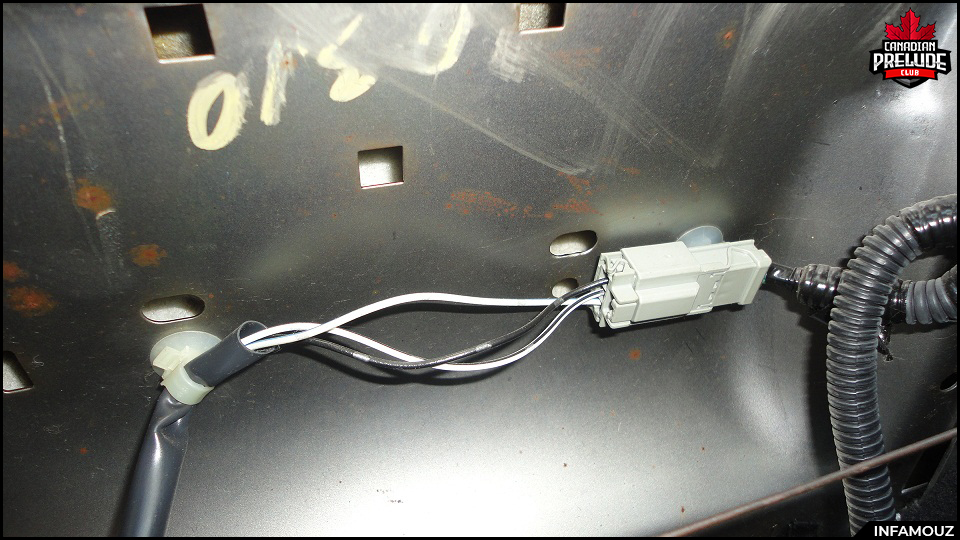
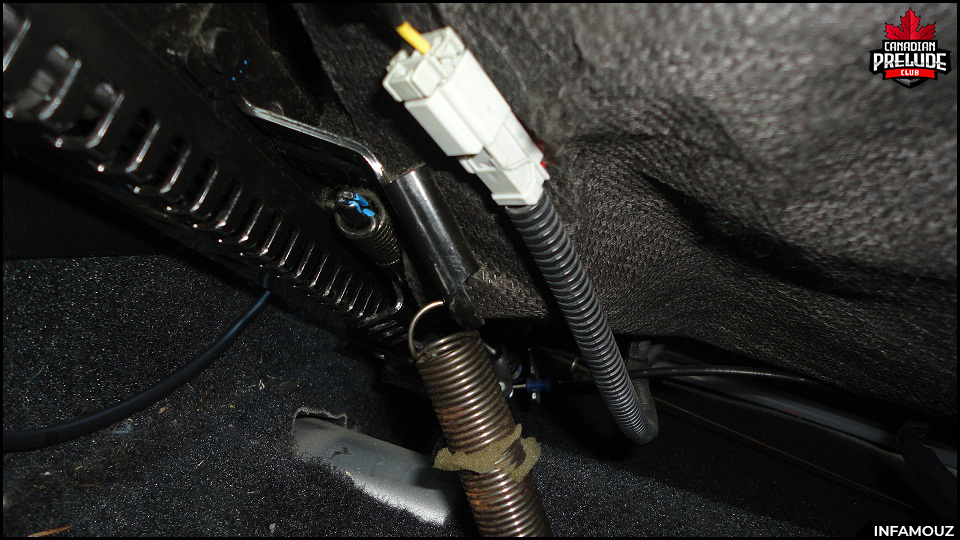
2. Lift up the seats and disconnect any wires. Driver side should have two wires for the seat belt indicator and the heated seats. Passenger side should have one for the heated seats.
3. Carefully remove the seats out of the car. Be patient – Pull the seats out by tilting the top end through the door and then pulling the rest out. Make sure you don’t end up scratching your door panels with the rails.
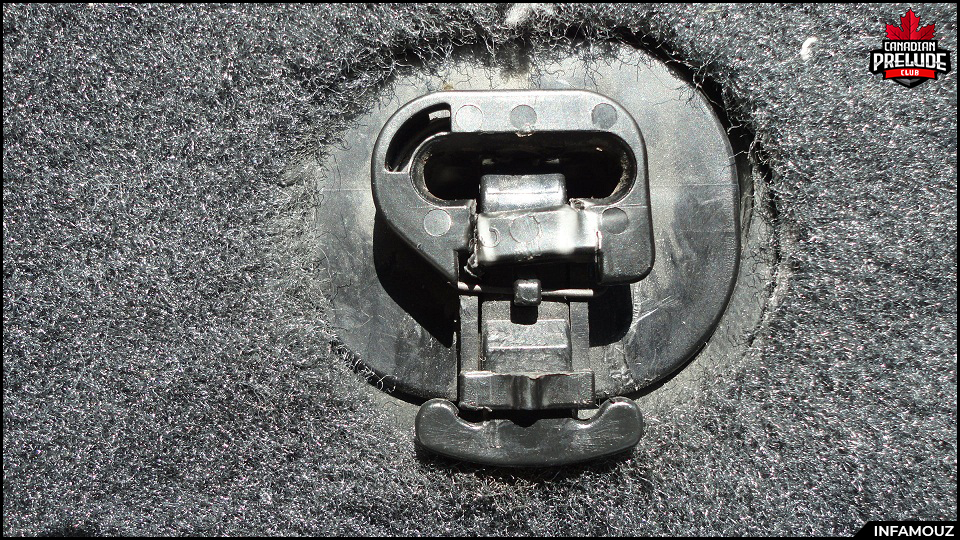
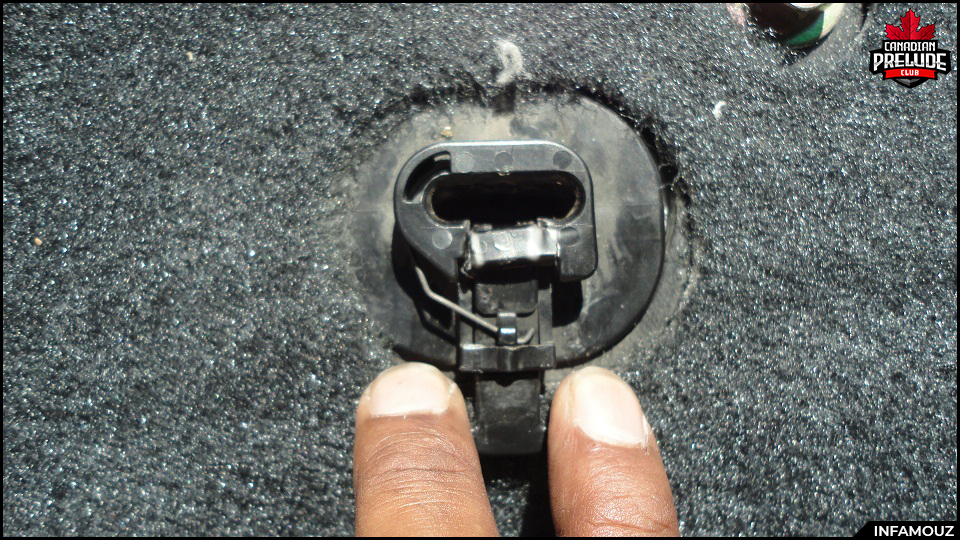
4. Remove the rear seats. Start with the bottom portion. On either side near the front seat belts, pull up the seat and you’ll be exposed to a clip locking in the bottom portion. Pull the “tab” piece towards you and lift up the seat. Do that for both sides. (one of my locking tabs was already damaged as you can see)
5. Push in the seat belts. Push down on the bottom portion and pull it towards you. It should be out now.

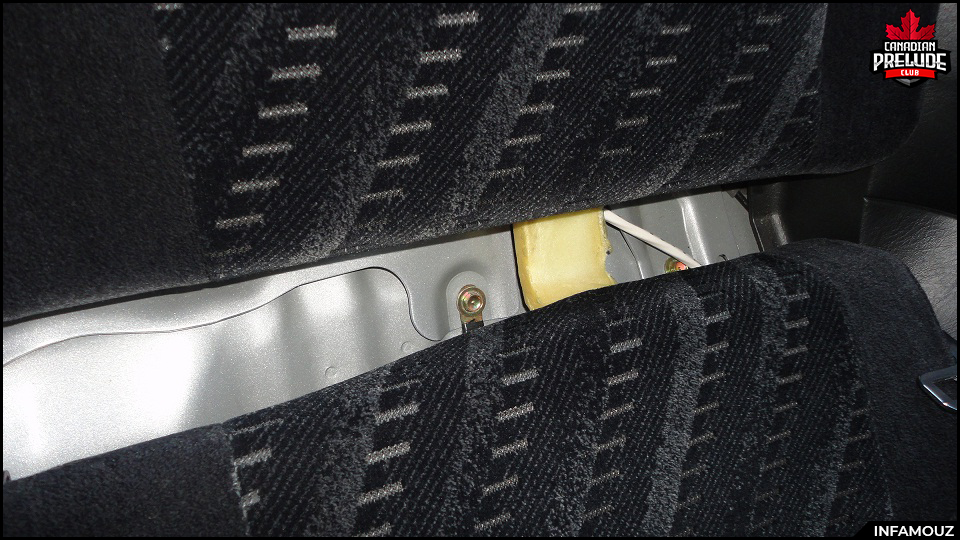
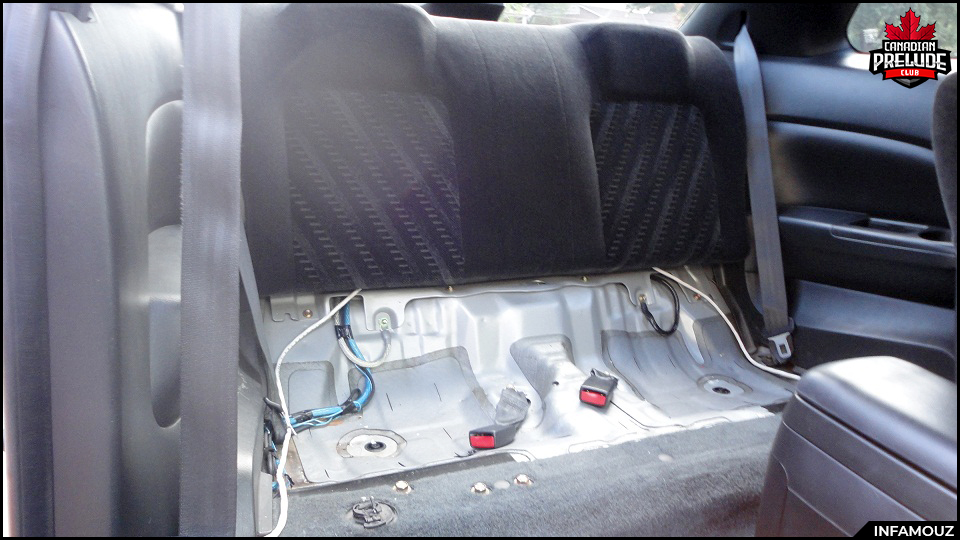
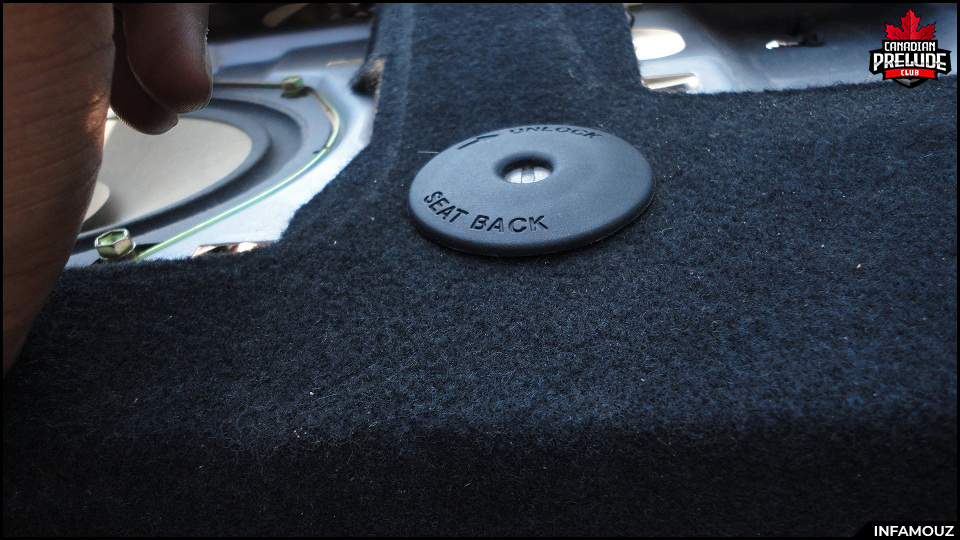
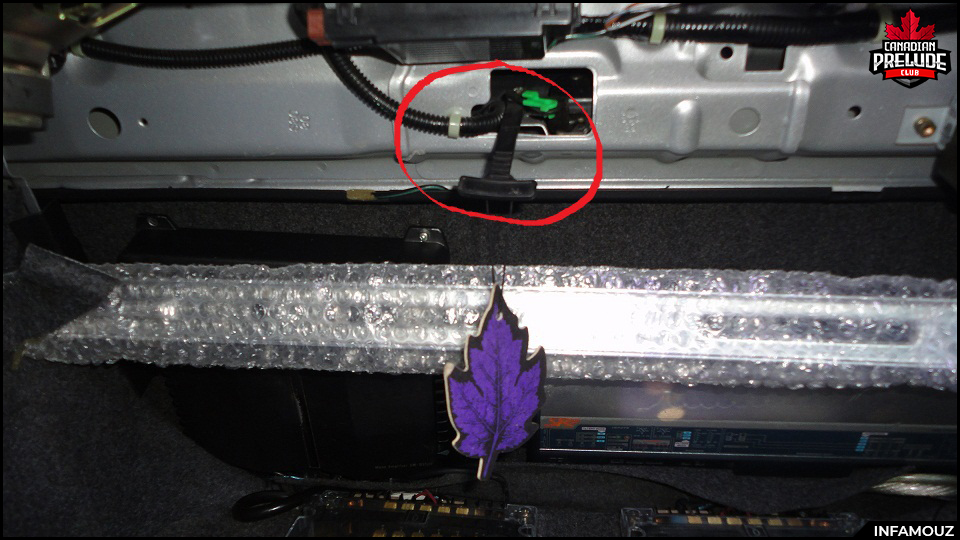
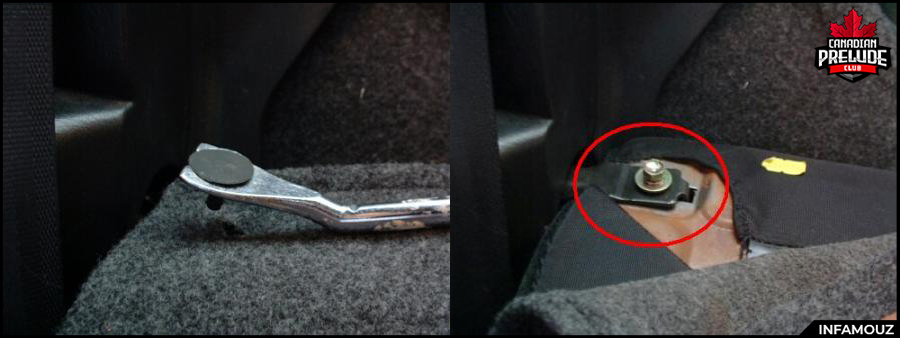
6. Remove the top portion of the rear seats. Fold down the seats (either use the key method or pull the seat release from inside your trunk). Remove the plastic push in clip in the rear corner on both sides. Once removed, you’ll be exposed to a 10mm bolt. Remove the 10mm bolt and release the bracket from the seats. Push down on the seat and pull it out.
It’s time to change the seat covers now!

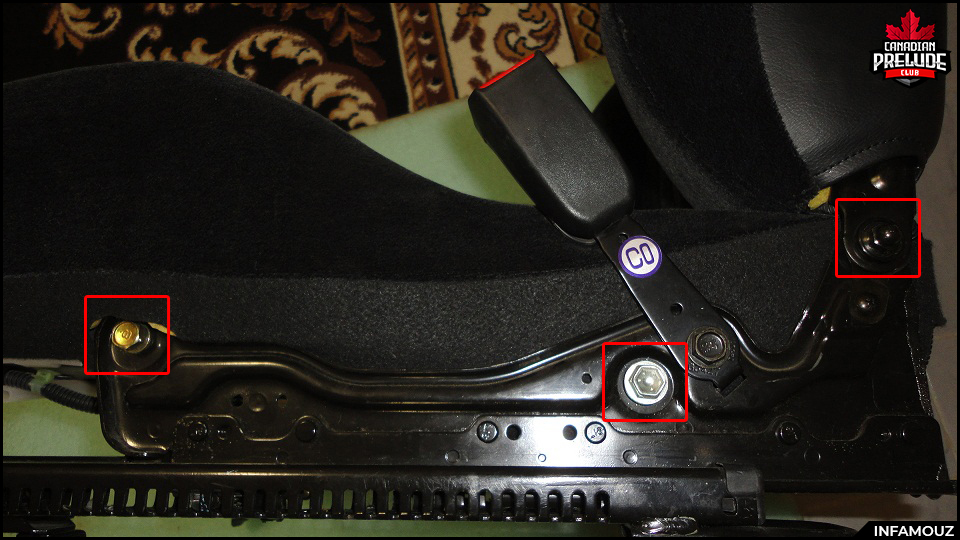
7. Starting with the front seats (bottom portion) – separate the seat pan from the rails. Only one side of the seat (closest to the door) will have a plastic cover over the rail. Using a Philips screw driver remove the two screws. Using a flat head screw driver or a panel popper, pop up off the plastic cover that goes over the recline lever.

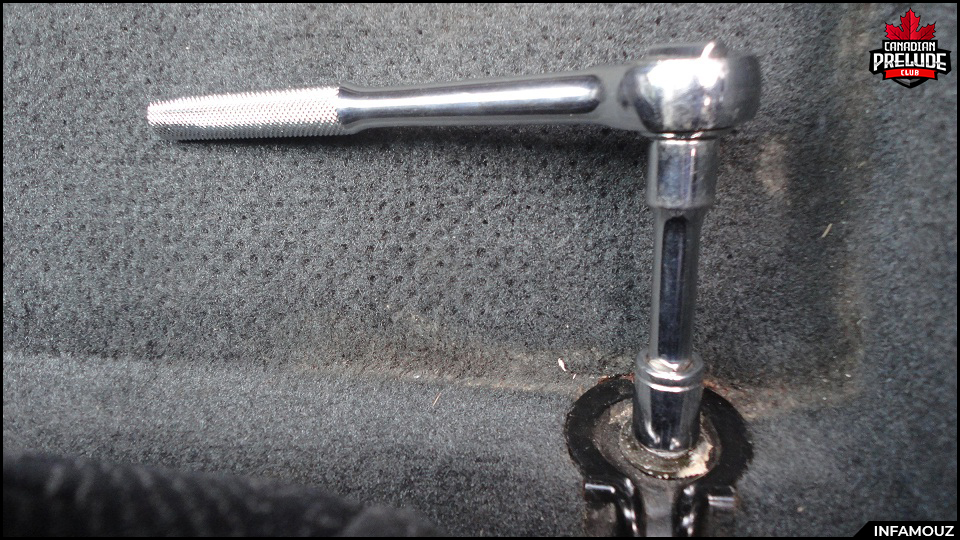
8. Remove the height knob/'seat pan adjuster' (driver side only). Look at the diagram below. There is a horseshoe locking clip holding the knob in place. Pull on the knob to expose the clip. Using a flat head screw driver, insert it under the clip and turn it (flick of the wrist). The clip should just pop out. You may not get it on the first try but keep trying…you’ll eventually remove it.
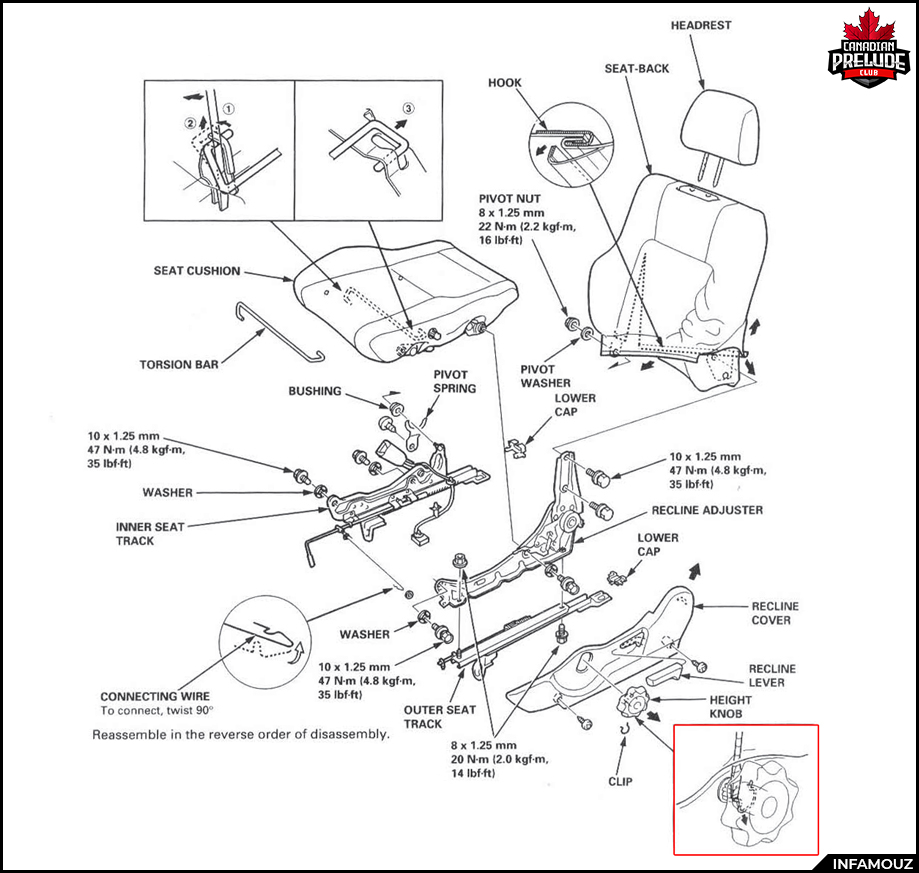
9. Once the plastic trim is removed, you’ll be exposed to a few bolts. They should be a combination of 10mm, 12mm and 14mm bolts. One of the bolts is hidden under the top section’s seat cover. Remove the bolts on both side of the rails and separate both sections from the rails. (For the preludes with heated seats, make sure to disconnect the wire that’s connecting the heating elements from both sections)
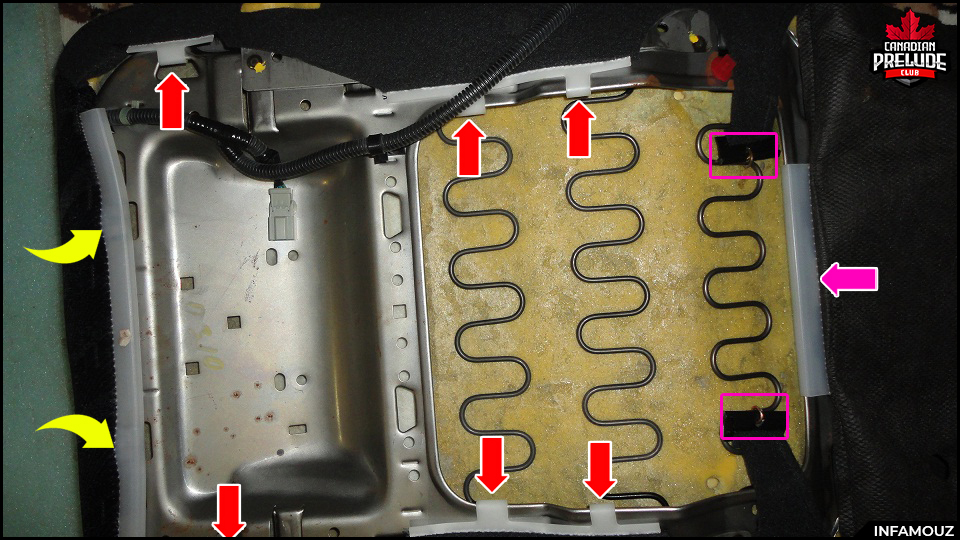
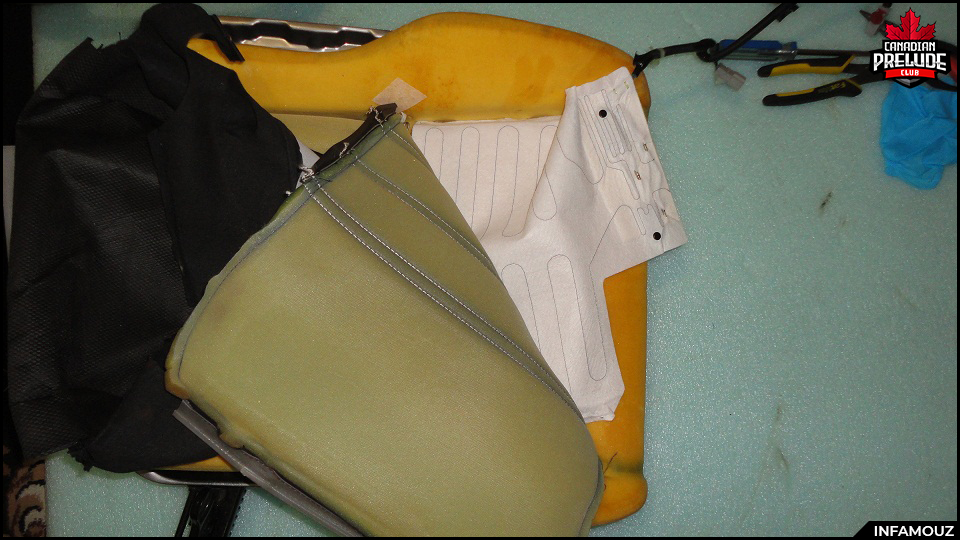
10. Changing the seat cover/skin on the bottom section of the front seat. Push up on the white snap-on hooks/clips to remove the first cloth layer. These are hard to pry off, so use a flat head screw driver when needed. You’ll be exposed to more clips and copper rings.
Make sure to follow this sequence – found this to be better.
Purple -> Red -> Yellow
Purple: Copper rings (either pry them with a plier or cut off). Can be replaced with zip ties.
Red: Same white hooks. Push and unhook
Yellow: Use a flat head to help unhook it. Once the others have been unhooked, there should be less resistance.

11. On top, the skin is attached to the foam with copper rings (around the perimeter) to a metal bar. See image below to give you an idea.
Red Dots: Copper Rings
Black Dots: Swift tacks
Blue Line: Metal Bar (to give it the crease)
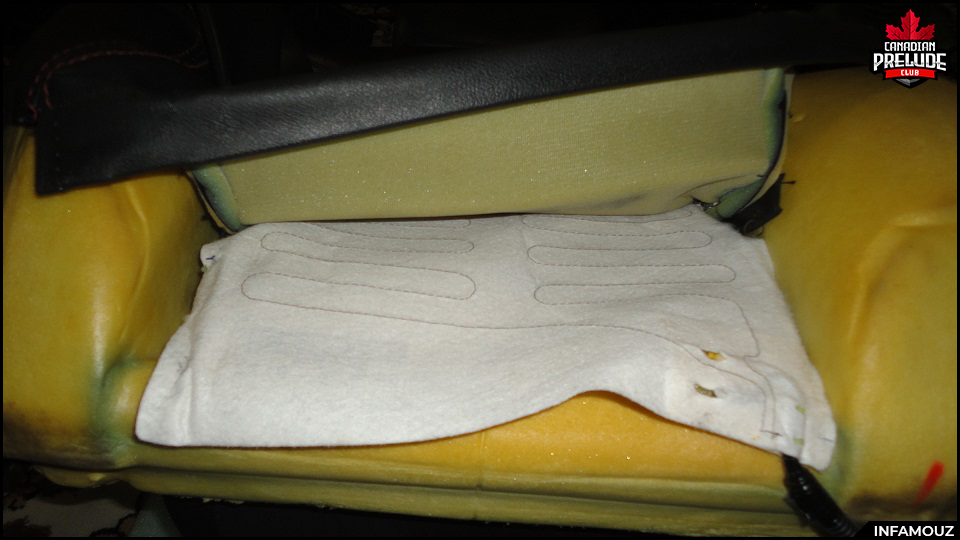
Yellow Area: Seat Heating Elements
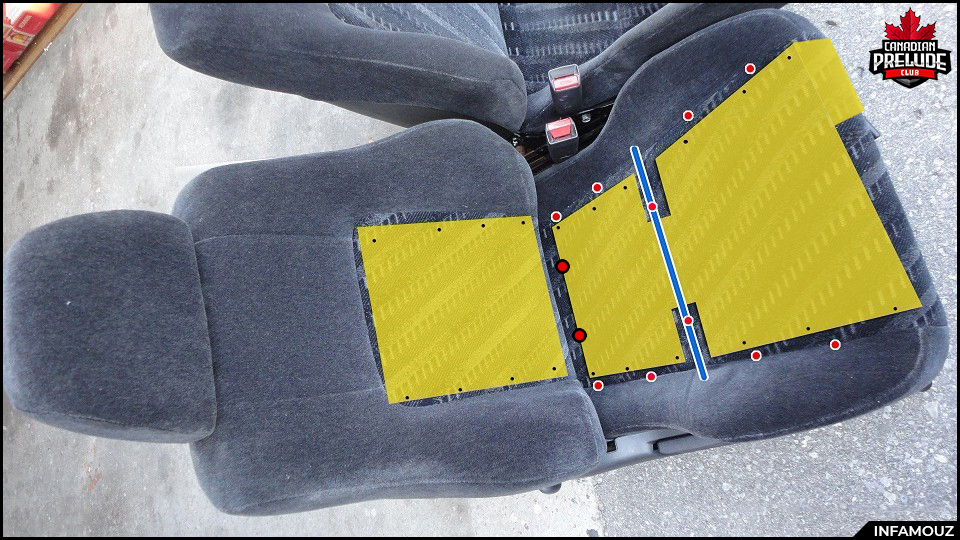
DO NOT CUT THE METAL BAR (in the blue square). ONLY CUT/PRY THE COPPER RINGS
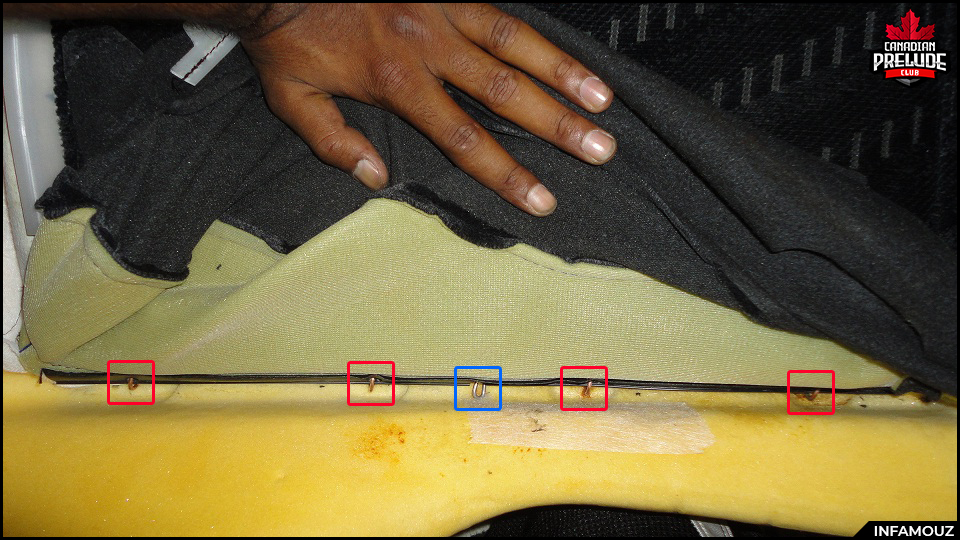
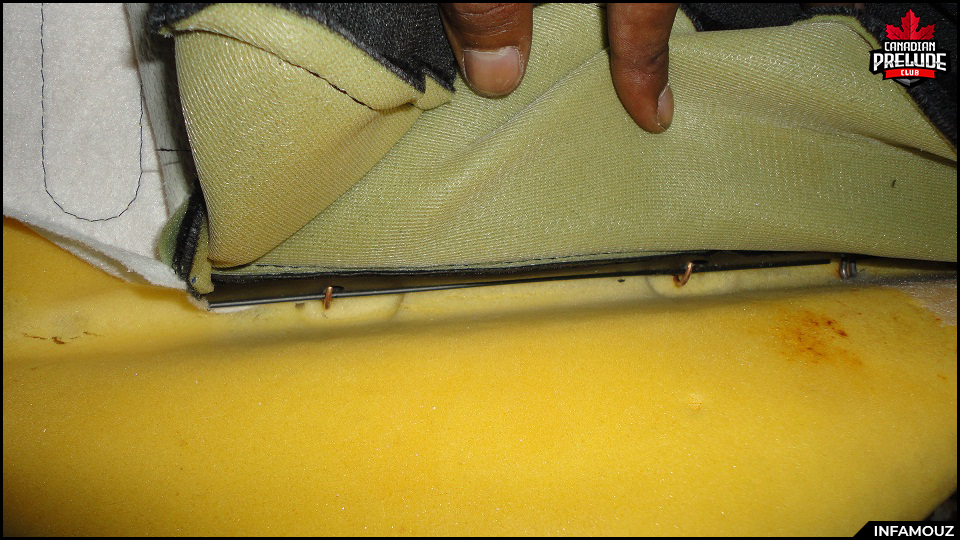
12. Once all the copper rings have been cut, you should be able to disconnect the metal ‘crease’ bar from the metal bars that run on the side. At this point, you should be able to swap over your new cover/skin. This is where you would install your OEM heating element for the bottom portion. Installation is in the reverse order. If you cut the copper rings, replace it with zip ties. They work just as great.
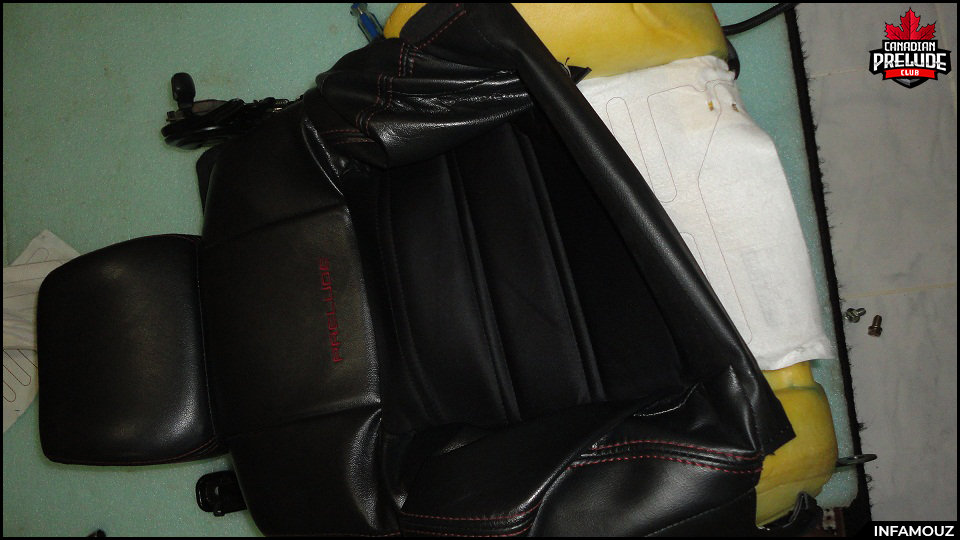
13. Changing the seat cover/skin on the top portion. Remove the headrest from the top portion. On the back the seats…all the way on the bottom, unhook the seat cover to expose the zip slider hidden inside it. Pull out the slider and unzip it all the way.
14. (Sorry, no pics for this step – for the time being) Near the holes where the headrests slide into, you’ll see a little slider part. Slide that out and remove the Philips screw underneath it. With access to behind the foam, look up to the top and you’ll be exposed to another Philips screw – remove that. (yeah…it’s in an odd place…only on a honda). Now you should be able to remove that headrest mount.
15. Unlike the bottom portion, the top portion is held on by springs. Just remove them with your hand or use a plier. That’s all to it. This is where you would install your OEM heating elements for the top portion. Installation is in the reverse order.
-------------------------------------------------------------------------------------------------------------------------------------------------------------------------------------
REAR SEATS
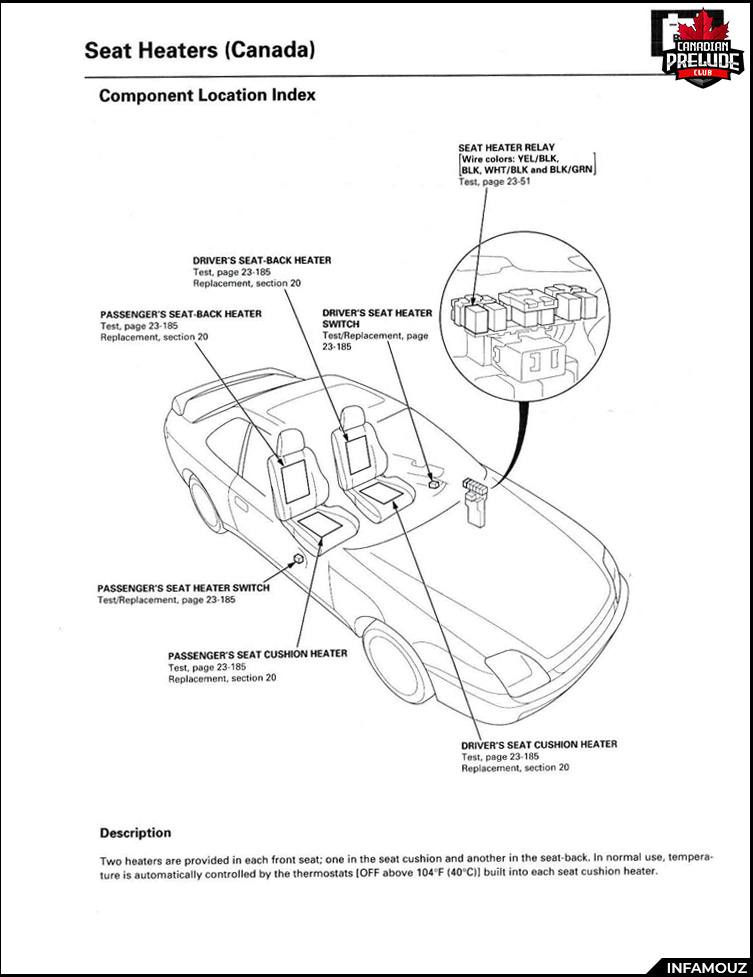
Since I didn’t have to change the skins on my rear seats, I don’t have any pictures. However, please see attached images from the service manual.
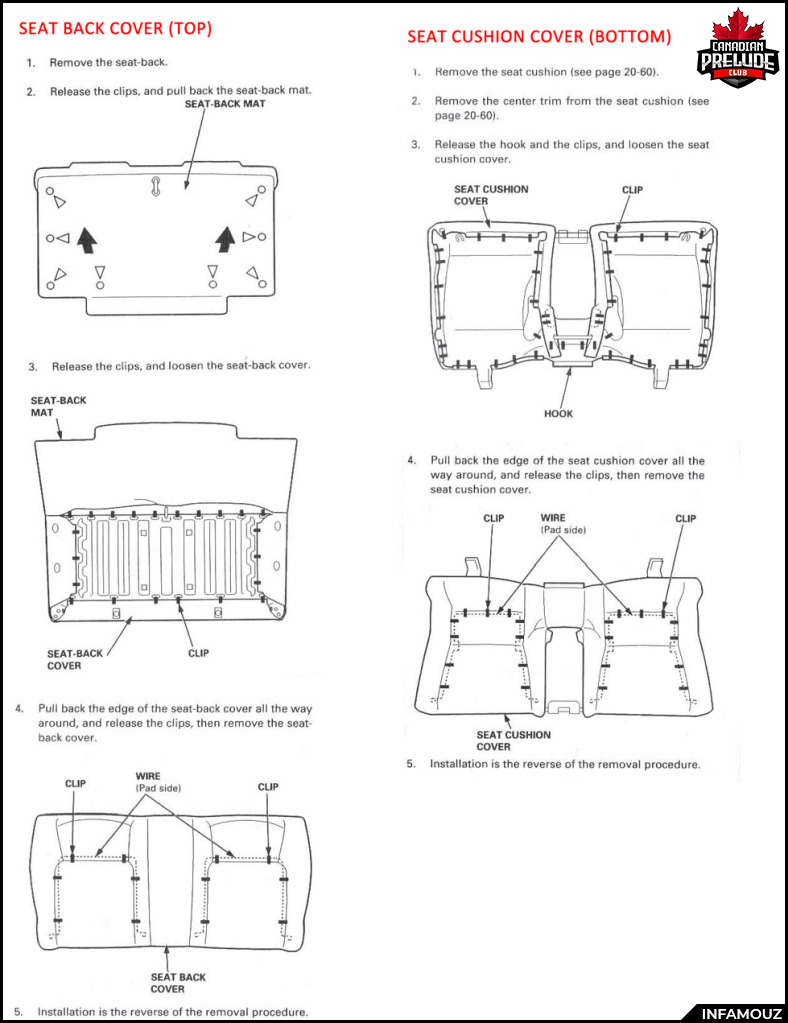
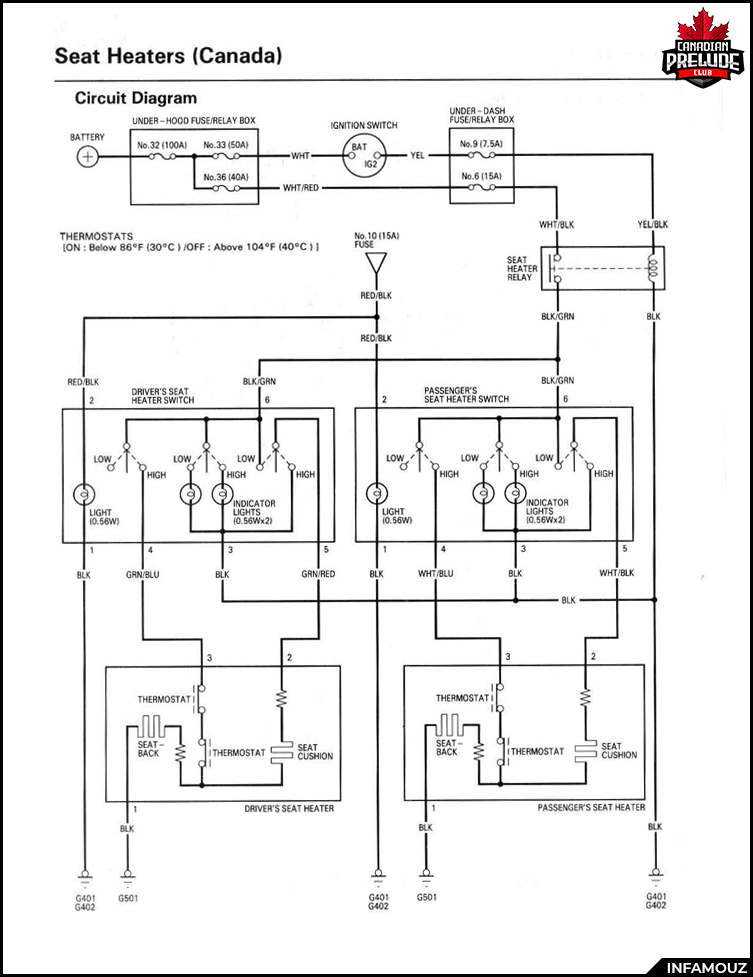
I know some of you reading this might be in the process of installing OEM seat heating elements. I have also attached pictures of the circuit diagram.
If I get a chance to help an individual out with this process, I will try and get more pictures and add it to this thread.
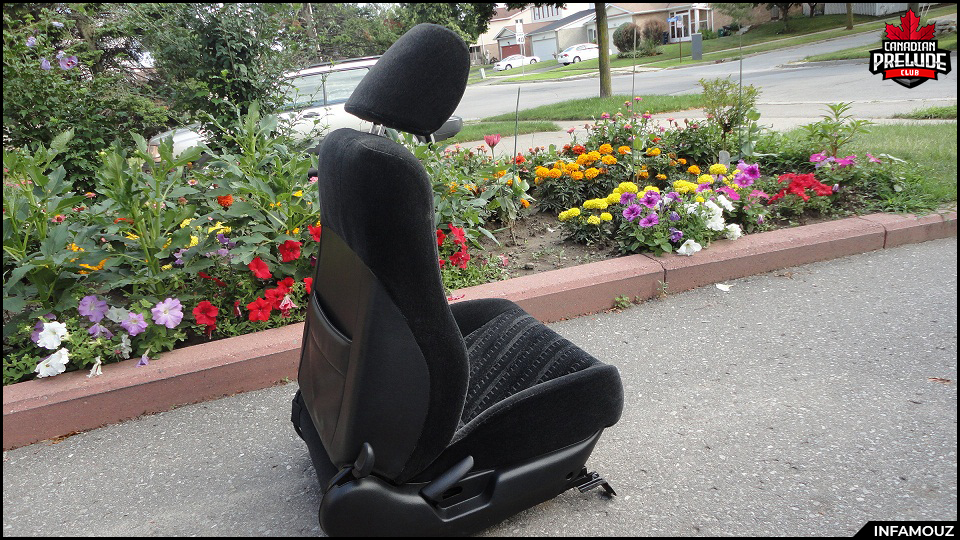
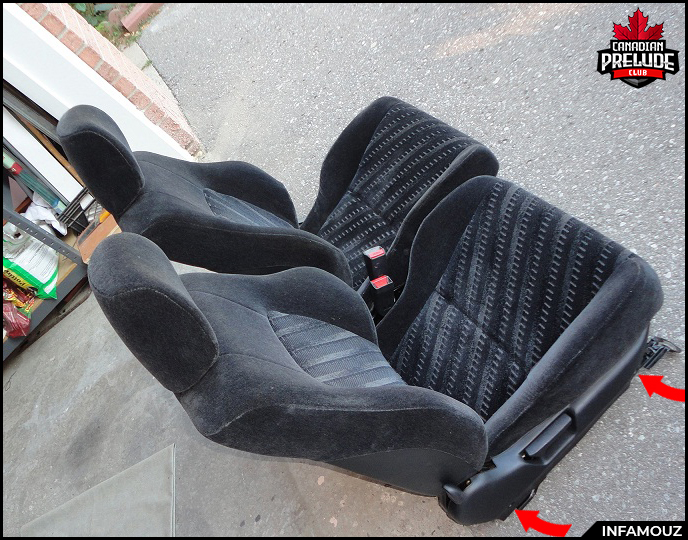
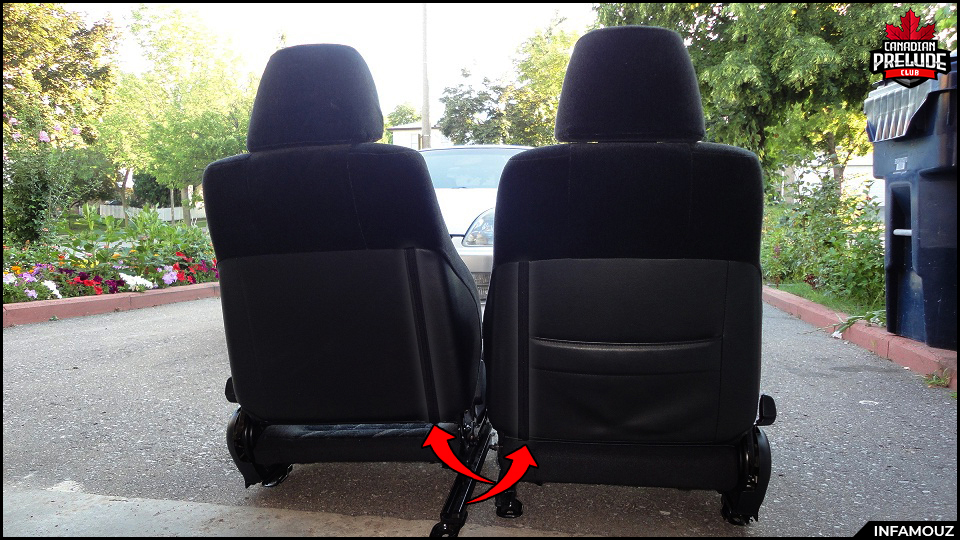
THE RESULT!
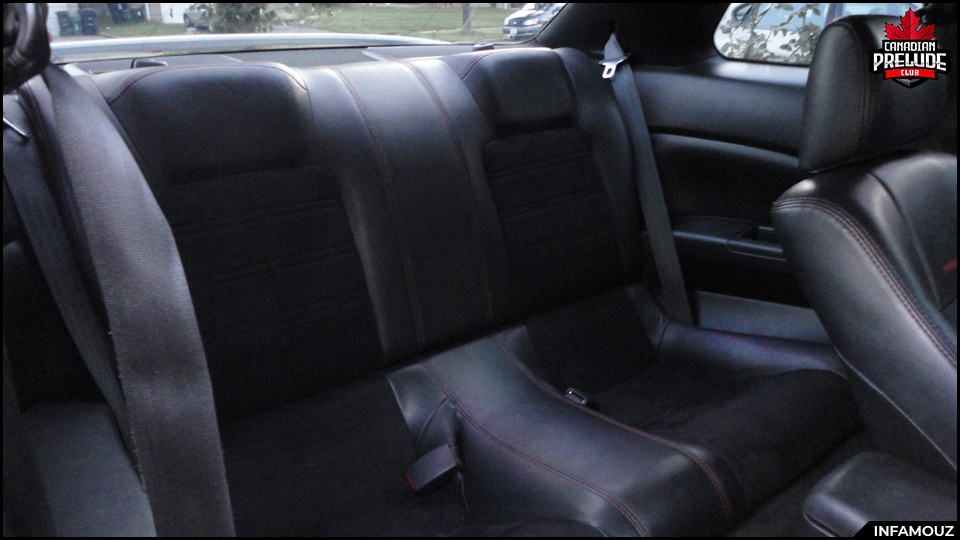
Enjoy!
Read the whole post before attempting this mod. Make sure to clear all and any questions you may have to accomplish the desired result.
I bought a full set of JDM Type-S Seats and wanted to keep the driver side adjustable pan and heated seat. Since Japanese vehicle didn’t come with heated seats, I had to remove the skins and swap it over my OEM seats.
This write up would help individuals who are either planning on removing/installing seats covers or adding in the heated seat elements.
NOTE: These seats are out of a Canadian Prelude. Therefore, you will encounter some pictures that will showcase extra wiring for heated seat elements along with the elements themselves.
Materials needed:
- Seat Covers (Fronts &/or Rears)
- Ratchet
- 10mm, 12mm & 14mm socket
- Flat head screw driver
- Philips screw driver
- Wire cutter or Pliers
- Zip ties
- Patience
1. Remove the front seats. They’re held in by 4 bolts (2 front, 2 back) – 14mm. Lift up the carpet to expose the front bolts. The rear bolts will have a plastic cover on top. Use a flat head screw driver to pry it off.
2. Lift up the seats and disconnect any wires. Driver side should have two wires for the seat belt indicator and the heated seats. Passenger side should have one for the heated seats.
3. Carefully remove the seats out of the car. Be patient – Pull the seats out by tilting the top end through the door and then pulling the rest out. Make sure you don’t end up scratching your door panels with the rails.
4. Remove the rear seats. Start with the bottom portion. On either side near the front seat belts, pull up the seat and you’ll be exposed to a clip locking in the bottom portion. Pull the “tab” piece towards you and lift up the seat. Do that for both sides. (one of my locking tabs was already damaged as you can see)
5. Push in the seat belts. Push down on the bottom portion and pull it towards you. It should be out now.
6. Remove the top portion of the rear seats. Fold down the seats (either use the key method or pull the seat release from inside your trunk). Remove the plastic push in clip in the rear corner on both sides. Once removed, you’ll be exposed to a 10mm bolt. Remove the 10mm bolt and release the bracket from the seats. Push down on the seat and pull it out.
It’s time to change the seat covers now!
7. Starting with the front seats (bottom portion) – separate the seat pan from the rails. Only one side of the seat (closest to the door) will have a plastic cover over the rail. Using a Philips screw driver remove the two screws. Using a flat head screw driver or a panel popper, pop up off the plastic cover that goes over the recline lever.
8. Remove the height knob/'seat pan adjuster' (driver side only). Look at the diagram below. There is a horseshoe locking clip holding the knob in place. Pull on the knob to expose the clip. Using a flat head screw driver, insert it under the clip and turn it (flick of the wrist). The clip should just pop out. You may not get it on the first try but keep trying…you’ll eventually remove it.
9. Once the plastic trim is removed, you’ll be exposed to a few bolts. They should be a combination of 10mm, 12mm and 14mm bolts. One of the bolts is hidden under the top section’s seat cover. Remove the bolts on both side of the rails and separate both sections from the rails. (For the preludes with heated seats, make sure to disconnect the wire that’s connecting the heating elements from both sections)
10. Changing the seat cover/skin on the bottom section of the front seat. Push up on the white snap-on hooks/clips to remove the first cloth layer. These are hard to pry off, so use a flat head screw driver when needed. You’ll be exposed to more clips and copper rings.
Make sure to follow this sequence – found this to be better.
Purple -> Red -> Yellow
Purple: Copper rings (either pry them with a plier or cut off). Can be replaced with zip ties.
Red: Same white hooks. Push and unhook
Yellow: Use a flat head to help unhook it. Once the others have been unhooked, there should be less resistance.
11. On top, the skin is attached to the foam with copper rings (around the perimeter) to a metal bar. See image below to give you an idea.
Red Dots: Copper Rings
Black Dots: Swift tacks
Blue Line: Metal Bar (to give it the crease)
Yellow Area: Seat Heating Elements
DO NOT CUT THE METAL BAR (in the blue square). ONLY CUT/PRY THE COPPER RINGS
12. Once all the copper rings have been cut, you should be able to disconnect the metal ‘crease’ bar from the metal bars that run on the side. At this point, you should be able to swap over your new cover/skin. This is where you would install your OEM heating element for the bottom portion. Installation is in the reverse order. If you cut the copper rings, replace it with zip ties. They work just as great.
13. Changing the seat cover/skin on the top portion. Remove the headrest from the top portion. On the back the seats…all the way on the bottom, unhook the seat cover to expose the zip slider hidden inside it. Pull out the slider and unzip it all the way.
14. (Sorry, no pics for this step – for the time being) Near the holes where the headrests slide into, you’ll see a little slider part. Slide that out and remove the Philips screw underneath it. With access to behind the foam, look up to the top and you’ll be exposed to another Philips screw – remove that. (yeah…it’s in an odd place…only on a honda). Now you should be able to remove that headrest mount.
15. Unlike the bottom portion, the top portion is held on by springs. Just remove them with your hand or use a plier. That’s all to it. This is where you would install your OEM heating elements for the top portion. Installation is in the reverse order.
-------------------------------------------------------------------------------------------------------------------------------------------------------------------------------------
REAR SEATS
Since I didn’t have to change the skins on my rear seats, I don’t have any pictures. However, please see attached images from the service manual.
I know some of you reading this might be in the process of installing OEM seat heating elements. I have also attached pictures of the circuit diagram.
If I get a chance to help an individual out with this process, I will try and get more pictures and add it to this thread.
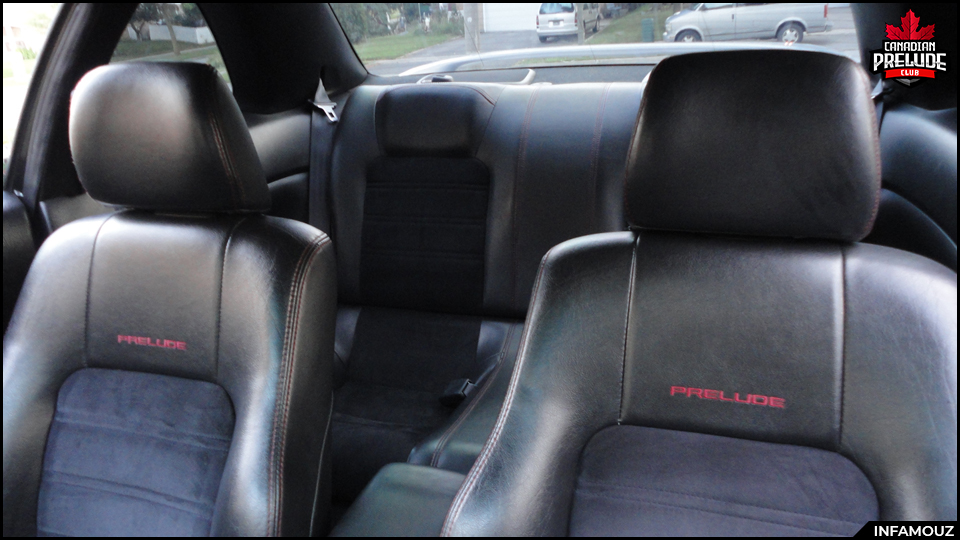
THE RESULT!
Enjoy!