HOW TO: Fixing the Temperate Control Cable. Forever!


HOW TO: Fixing the Temperate Control Cable. Forever!
Write-up courtesy of Shimee via PreludePower
----------
DISCLAIMER: Canadian Prelude Club and I (infamouz) are not responsible/accountable for any errors, damage, unwanted results that you may come across or experience! DO THIS AT YOUR OWN RISK!
Pièce de Résistance: Interior Control Cable
First begin by removing the console bezel:
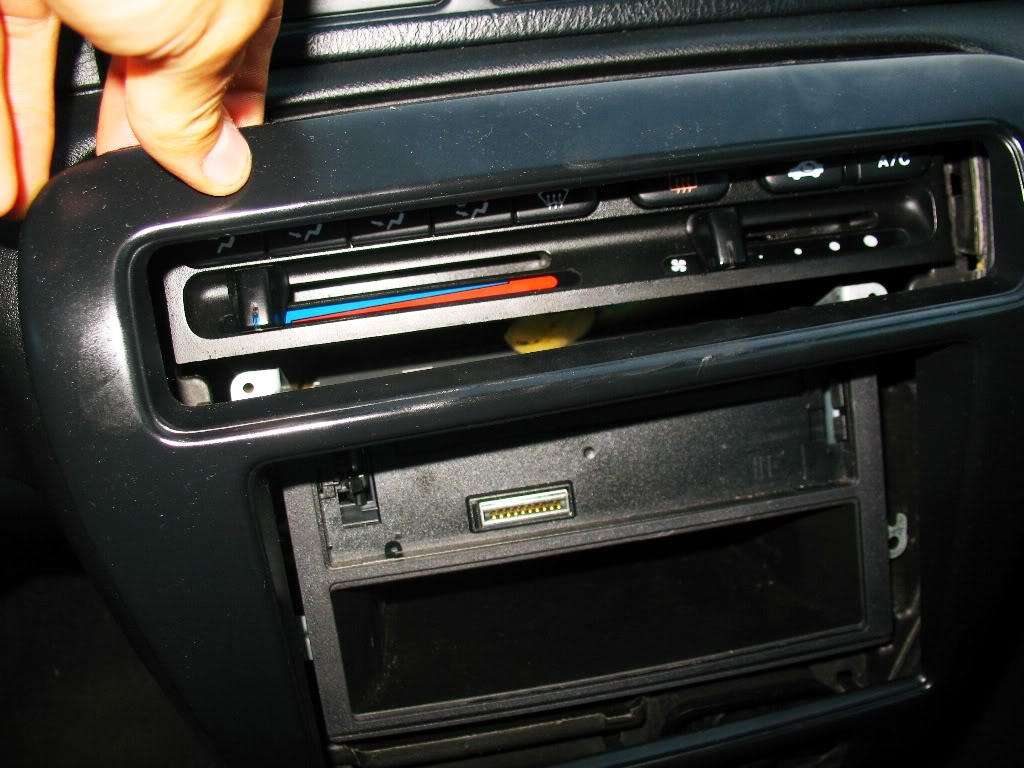
Carefully use a rag or a towel so you don't scratch anything up.
Pry off a bit so you can get your fingers under, then pull:
The clips will give fairly easily.
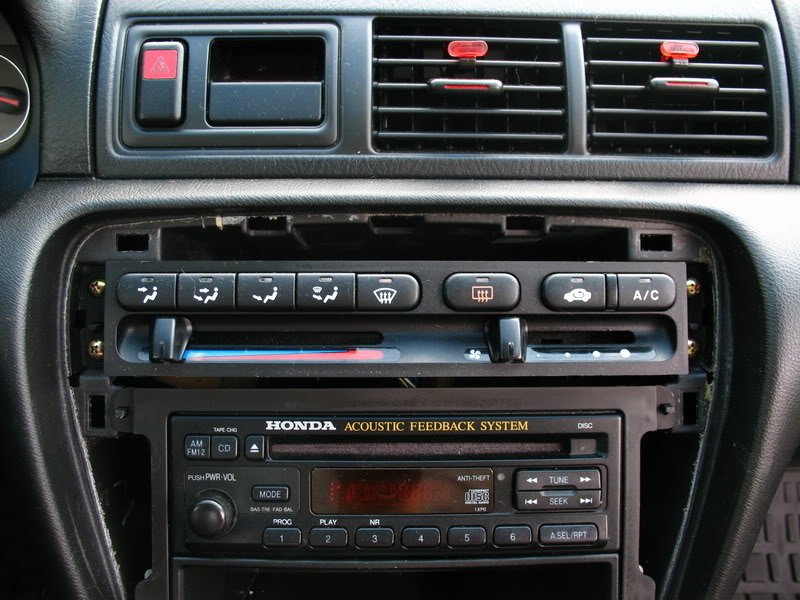
Remove the Climate Control unit:
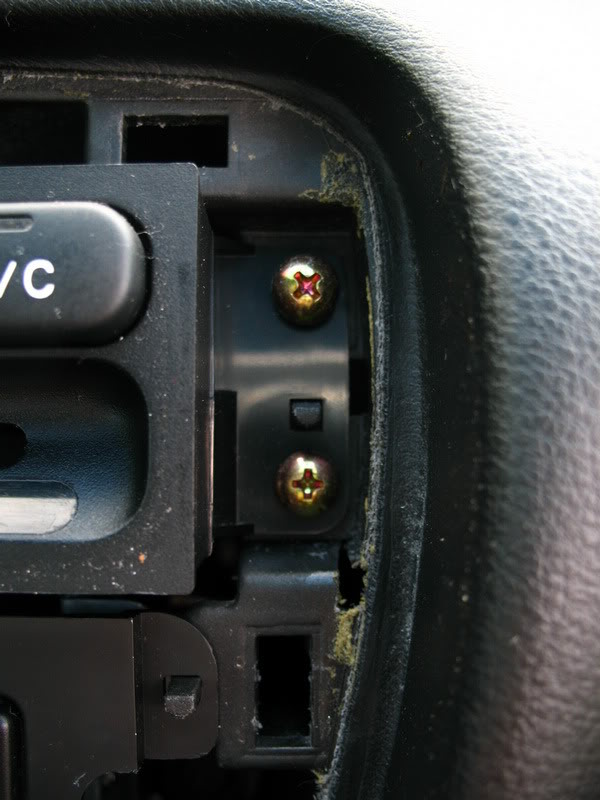
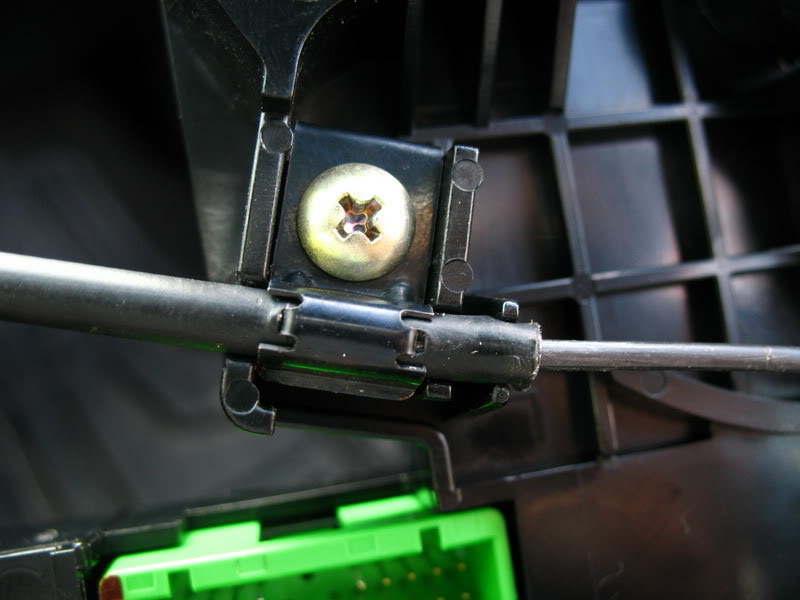
There are four screws on both sides.
Now undo the interior cable at the passenger foot well:
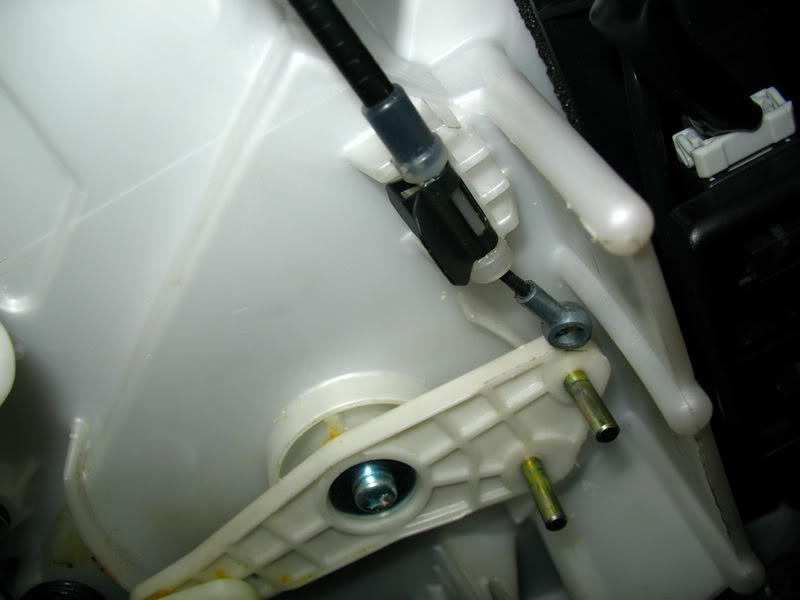
Just pull it out of its clip and it'll pop out.
You can now pull out the Climate Control unit.

I bet you're glad you undid that cable! I was!
That is after I figured out it doesn't have enough slack to pull out and undo the harnesses.
Anyway, pull it out a bit and remove the harnesses so you can pull it out entirely.
Look on the underside and you'll find the clip holding down the cable:
This is your culprit if the interior cable has become your evil fiend you cannot conquer.
There are one of few possibilities:
Your cable simply ripped itself out of the clip.
Your cable stripped some of the sheathing.
Your cable broke the clip. (No.3 here. Part#:39383-SA5-000)
Your cable broke the clip off.
Which calls for one of few solutions:
Unscrew the clip and stuff the cable back in.
Unscrew the clip, rotate the cable, and stuff it back in. (what happened to me).
Purchase said clip from a Honda dealer.
See if you can reattach the clip. If not, go have some fun with JB Weld. Or you might have to buy another heater control unit.
Two for Sunday: Exterior Cable, Water valve control.
First you have to hang down upside down in the passenger footwell:
You'll see something along these lines.
I have a footwell light; it said hi to me. Nothing will say hi to you.
Locate the temperature control lever:
Look a little further down and the water valve control cable will sit in this clip. Pull it out. It will not want to come out. You want it to come out. Yell, scream, curse, and pull it out. You will yell, scream, and curse pulling it out.
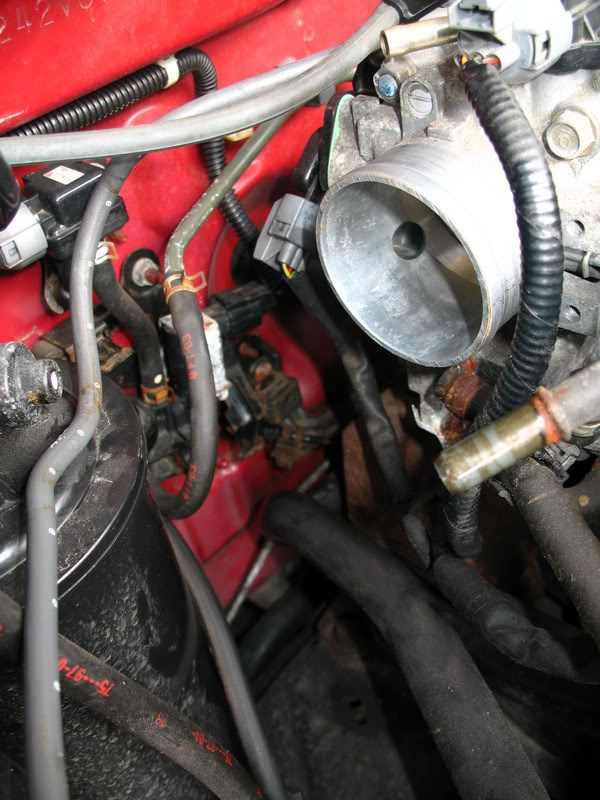
Pop the hood and get ready to look dirty like a real handy man:
You'll be working somewhere around here.
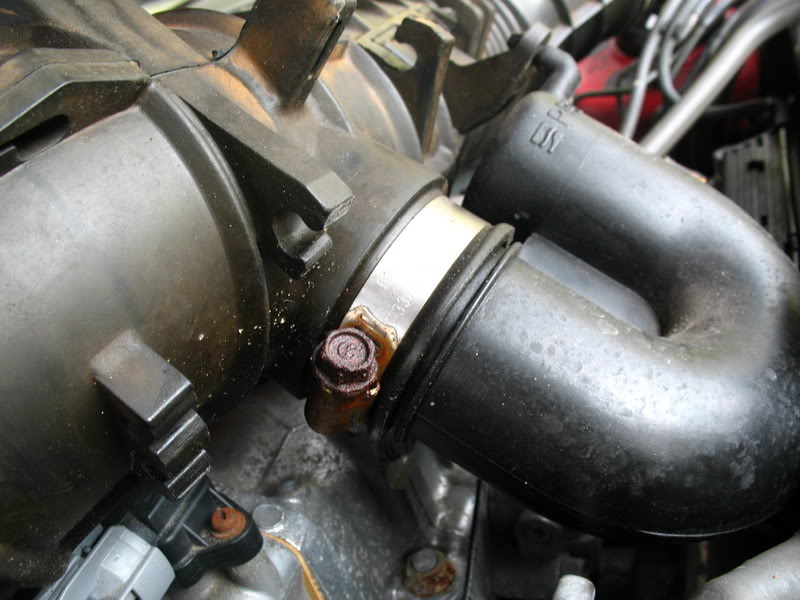
Go to the throttle body and undo the clamp:
That bolt is a 6mm bolt if you're a little ratchety from all the iced tea.
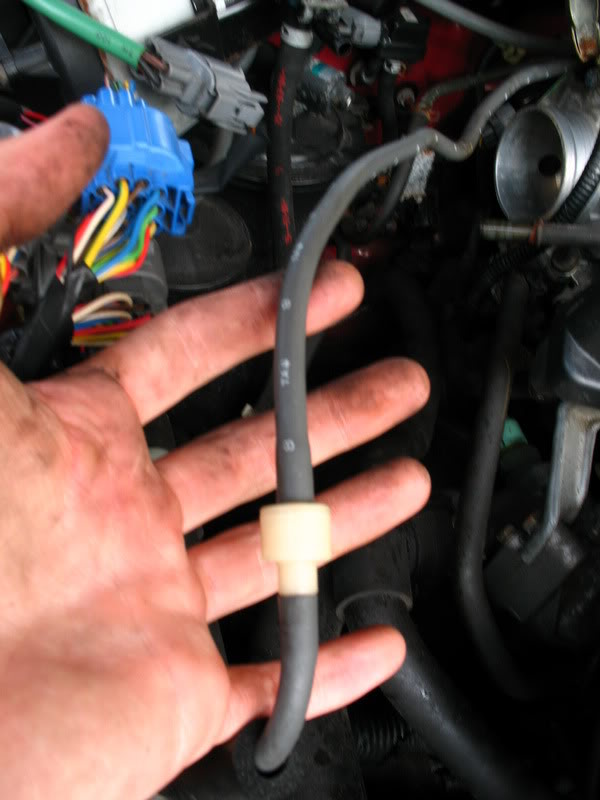
Undo the clamp holding this little hose to the TB:
Trust me, it'll just make things easier.
Pop off its other end and lay it aside:
Press down on the intake and the blow off from the intake to valve cover will just slide out:

I didn't even have to undo the clamp, it just slid out like a flaccid cock.
Also don't forget to pull off the intake tubing from the airbox. Kinda obvious, unless you're a daredevil and want to remove the airbox as well. Huzzah!
When you pull off the intake you'll have this tube hanging down:
This snaps into a couple hooks on the underside of the intake tube.
One of them is pictured here:
It's the hook directly above the metal ring-clamp.
Pull out the intake tube and look down into this area:
You can just barely see the clip that holds the cable on the firewall side.
To make room, I moved this:
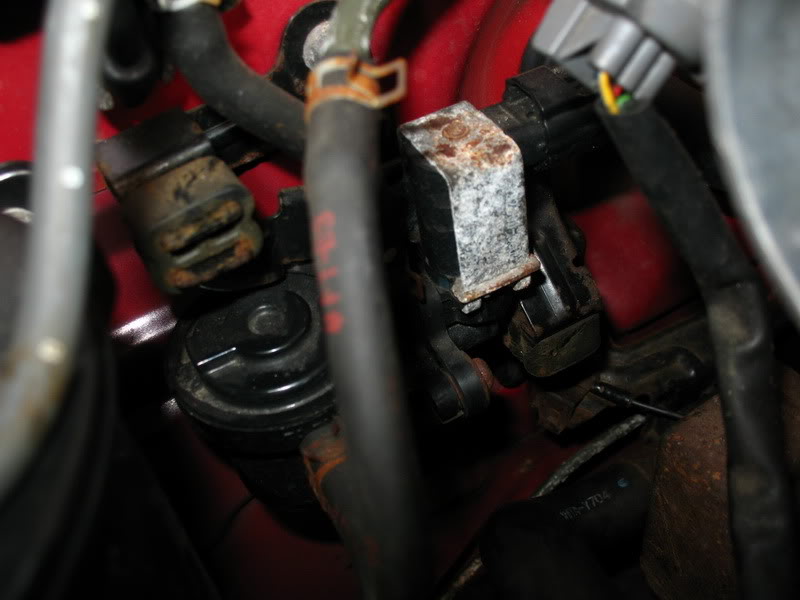
I know it's not clear, but it will be obvious. It's some bypass valve or solenoid thing. Whatever. It sits on rubber dampers so just slide it off and push it away.
Anyway, look in the area and you'll find this:

It's the clamp that holds the water valve control cable to the bracket.
Just pull at it from below and it'll come off. A squirrel can figure this out.
This will free the cable and will allow you to remove it. Slide its head off the pole of the water valve lever and pull 'er out.
A little note about this picture ....
DO NOT remove the grommet. Unless you want to make your life miserable trying to get the fucking thing back onto the firewall, do not remove it.
I spent 30mins trying to get it so the firewall metal would be between the two ridges (which you can see in the above picture. Engine side ridge has rust on it, cabin side ridge is the smaller diameter thats a little rounded). So just hold down the grommet somehow and pull the cable through it.
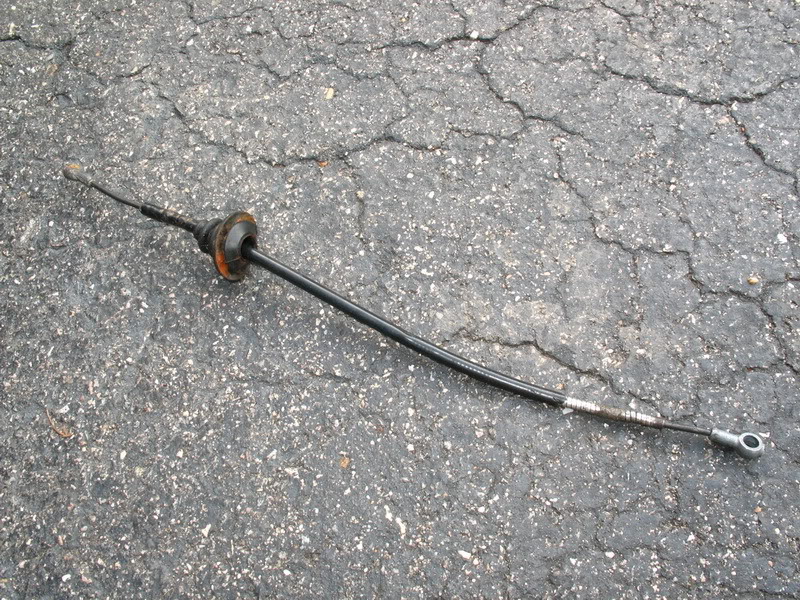
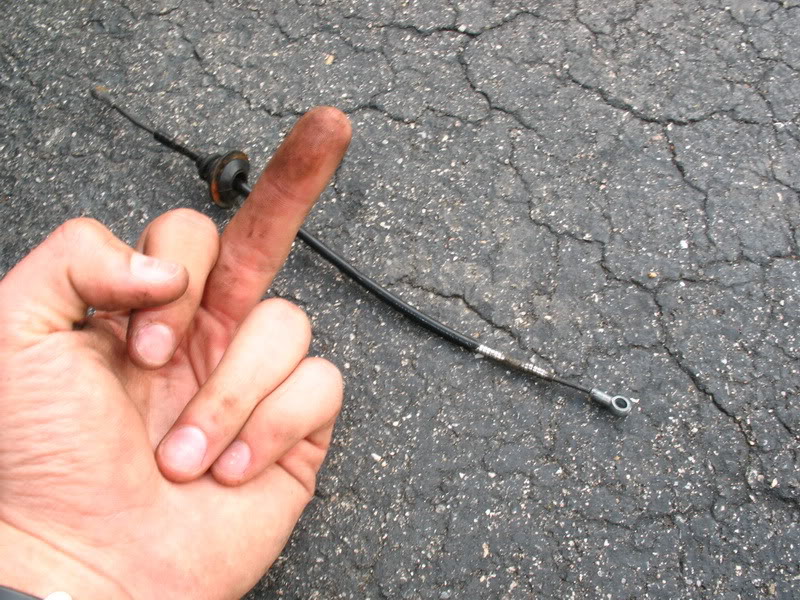
Anyway, pull it out and feel free to show your emotions against it:
At this point our paths deviate. You can choose to be a sissy and get a new cable from Honda, which I guarantee will seize again within a year or two. Or you can be awesome like me and come up with a WIN solution that will last foreverz.
I am not a sissy plus I am impatient. The day after I did this I went to a junkyard with my friend and got a $2 fix (which involved some ingenuity). This bit of ingenious thinking requires the water valve control cable off an accord of the same years (civics apply as well).
Find said car and pull off said cable:
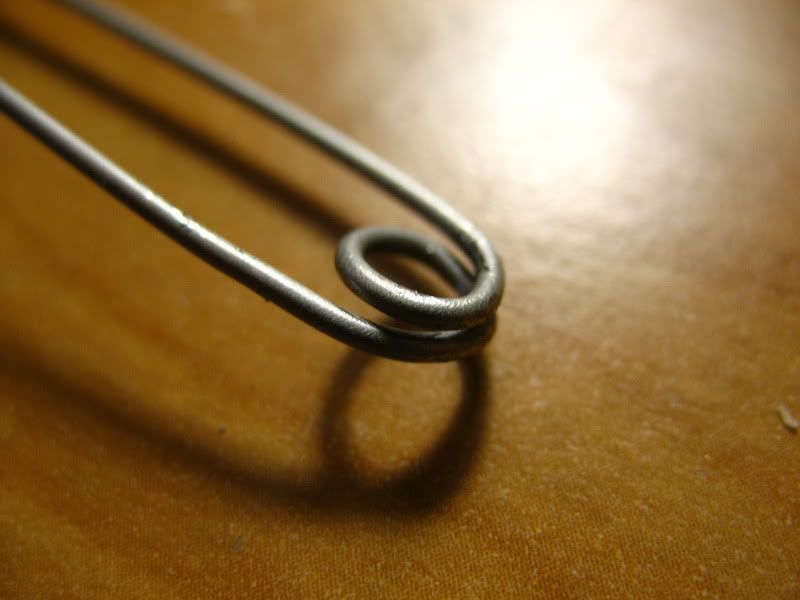
It will have end links that look like so:
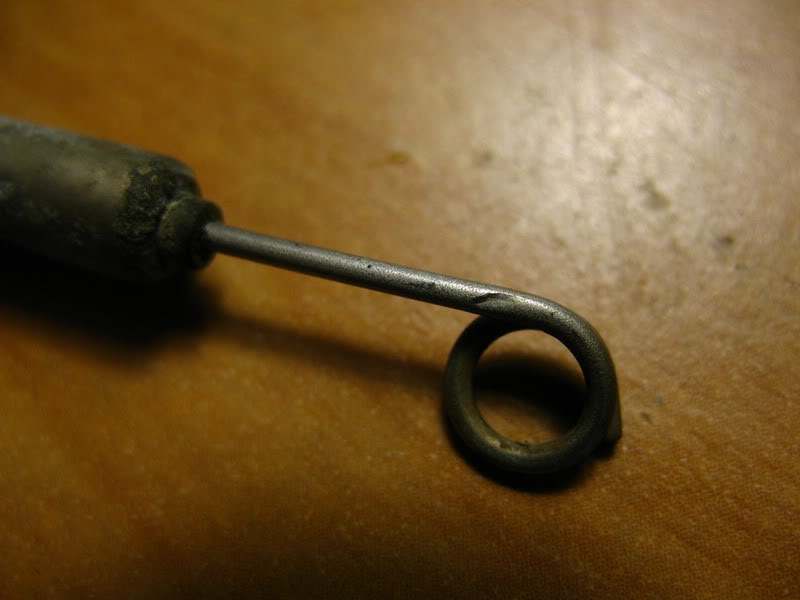
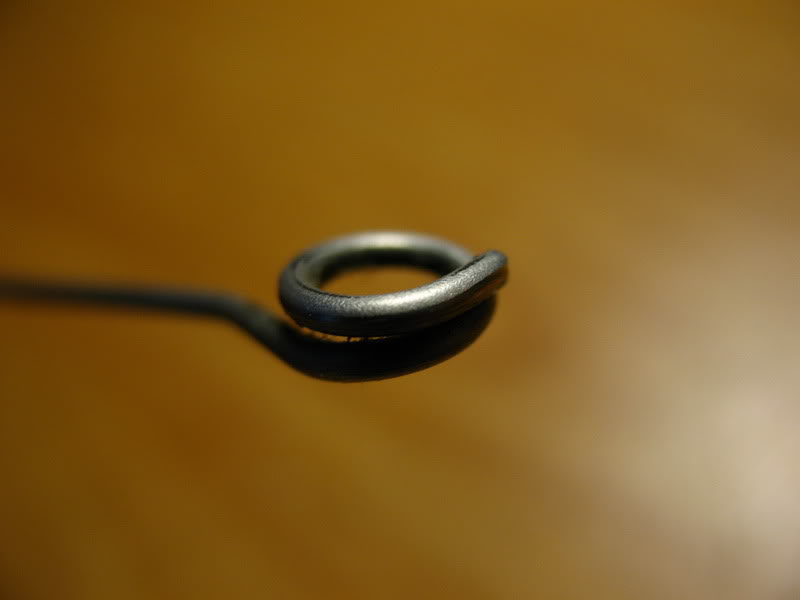
See, fits perfectly! (on the preludes air/mix lever; inside of cabin)
Problem is, the cable off a 97-98 accord is too long:
Use some crafty skills hidden deep within your brain stem and shorten the NEW cable; mine were in my pockets. Line up the two then:
Snip off the end of the NEW cable with wire snips. (ONLY THE END)
Measure or match up the lengths of the rubber jacketing of both cables.
Cut the jacket on the new cable to the length of the old one.
Take the newly exposed cable and form it so it looks like the other end.
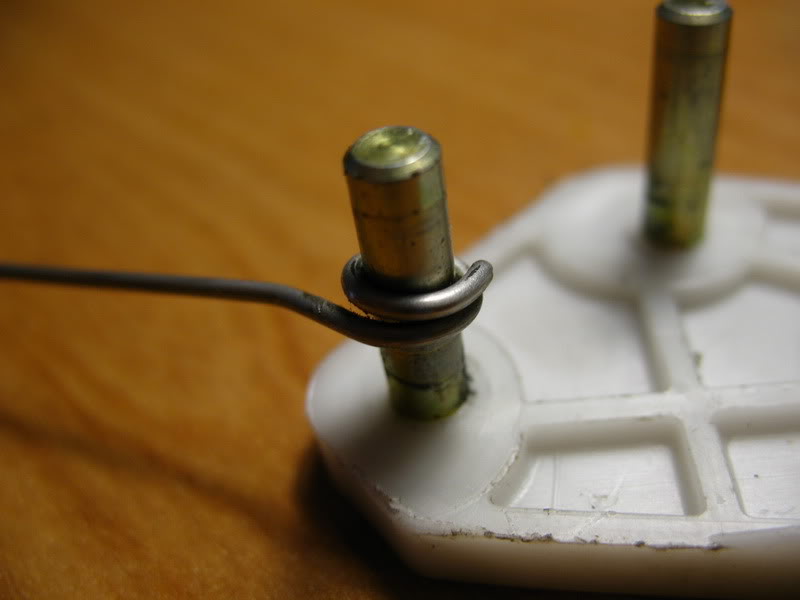
The easiest way to manipulate the end is to remove the air-mix control lever, hence why mine is on the table:
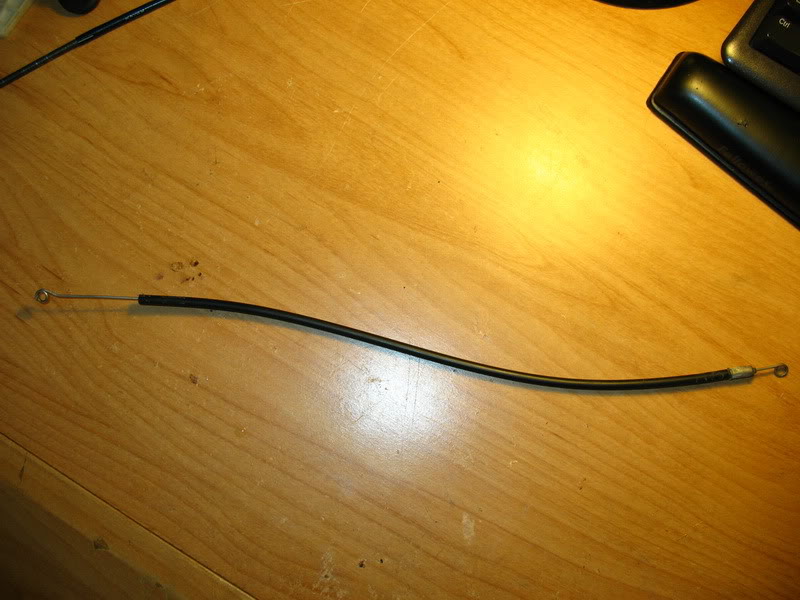
Wrap it around one of the poles and you'll get the perfect shape and size. Then just snip off the excess. Install is the reverse of most of this procedure. Just take your newfangled cable and stuff it back through the grommet.
Do things properly and perform a cable adjust procedure:
And for the curious...
The reason these cables seize is because how they are made. It is a cable that has another cable inside it. The inner cable is a length of thick steel wire, covered in a rubber jacket. This sits inside another cable, which is simple wrapped in a steel ribbon, which is covered by rubber.
The problem here is that since the outer cable is not a solid piece of metal and is a ribbon, there are air gaps between the ribbon windings. This means that air can get in here and cause the steel to rust. When the steel rusts it expands and squeezes the inner cable, seizing it.
The new cable I got is instead a thick gauge steel wire inside a thick PVC jacket. There is no cable within a cable bullshit, and there is no wound outer steel jacket exposed to rusting. So, there's nothing that can seize the inner cable.
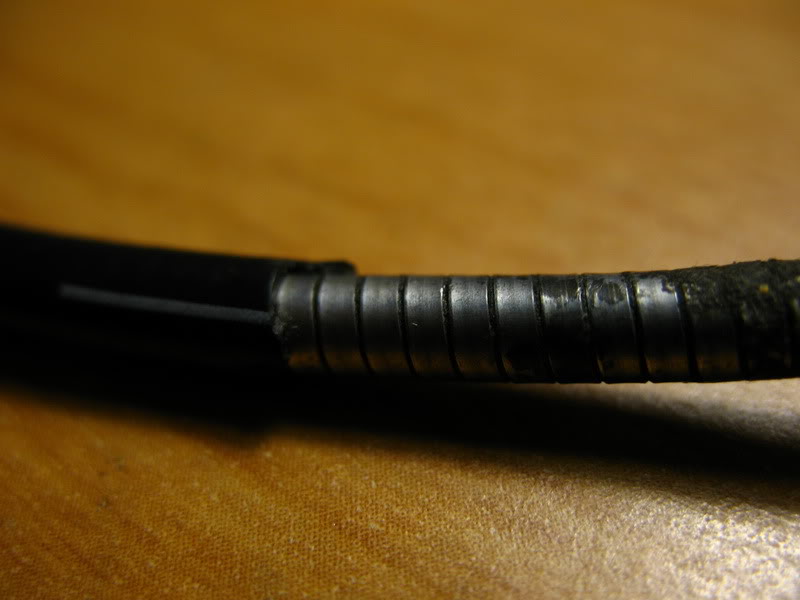
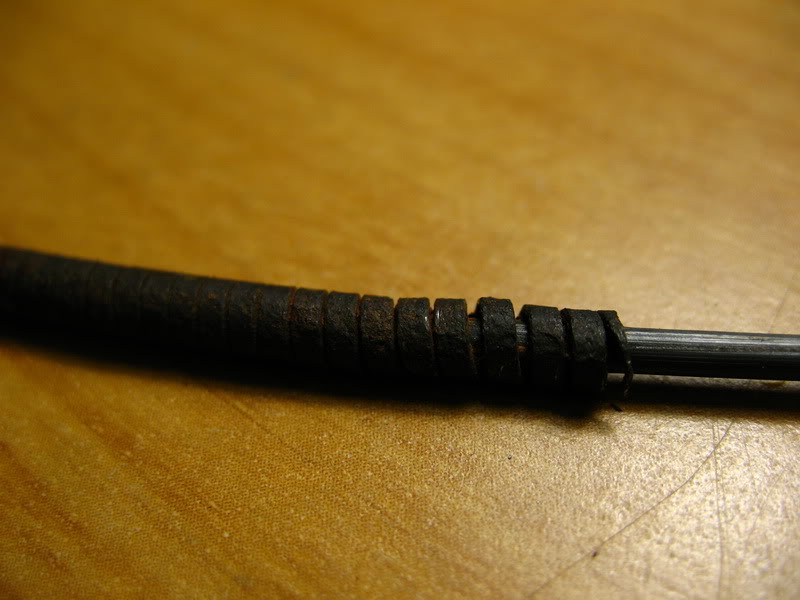
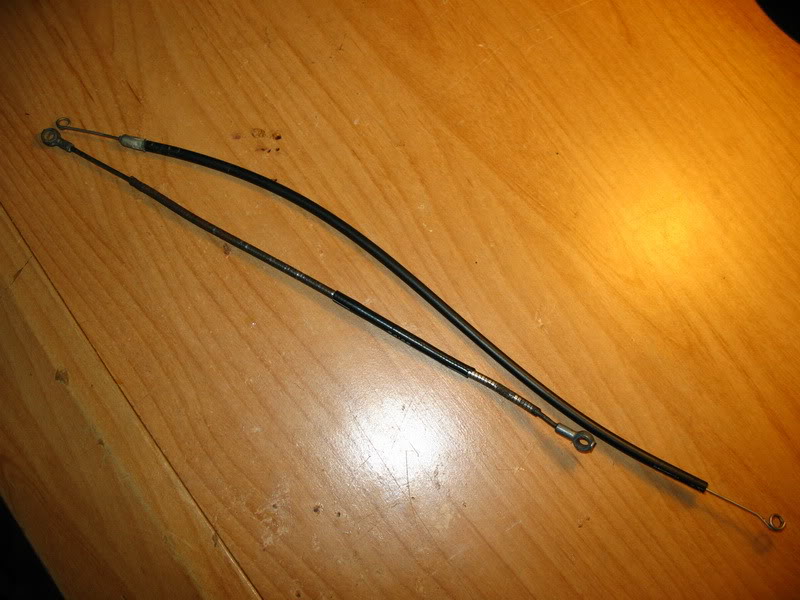
On the left is a good portion of the OLD cable. On the right is a rusted part.
Three: Squeaky mice in a squeaky blower fan.
Your fan might be making a squealing noise as well.
Start by stuffing yourself into the footwell and looking for this:
Unhook the black tube and orange harness:
THE BLACK TUBE IS IMPORTANT. It serves as the cooling duct for the motor. Do not forget it in the reassembly.
There are three bolts holding it up:
They are 8mm bolts with a slot for a Philips screw driver.
Once you remove all three, the motor will not just slide down. You'll have to play with it. You'll have to remove the black panel on the side and remove the black control box from the bracket, else the motor will not come out.
Once you have it out, vacuum out the cavity the motor was in. Wipe down if you like. Then vacuum the motor itself, again wipe if necessary.
The main thing to do here is pull off the fan:
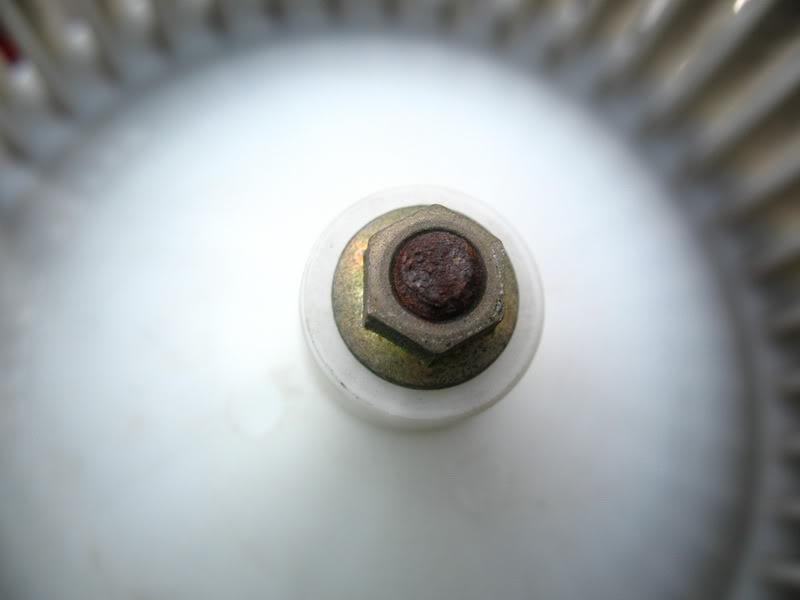
Remove that bolt and pull the fan off. Might be a tad difficult at first.
Here's the fan off:
Important part is to vacuum out the crud through the vent holes. Also use compressed air if you have a compressor. Blow out the crap that amassed inside it. Unless the thing decides to spit all over you:
Bastard.

FYI:
I also pulled out the motor itself. There is a small black screw on the underside of the housing holding the motor to it. I pulled it out enough (it's really stuffed into the housing!) I pried the face of the motor off in order to get into the motor housing itself. This I am not detailing because it is not a necessary stop. If you're curious, then by all means go for it. If you're like me and have some background of tinkering with crap like this, it won't take long to figure out how to pry the motor open.
I simply did this to check on the conductive pads/brushes. I wanted to see how worn down they are. Not knowing what you're doing or how to work on electric motors is a bad idea. You can break something (like I almost did) and cost yourself some big money. While it was open I lubricated the contact surface where the pads touch with some dielectric goop.
----------
DISCLAIMER: Canadian Prelude Club and I (infamouz) are not responsible/accountable for any errors, damage, unwanted results that you may come across or experience! DO THIS AT YOUR OWN RISK!
Pièce de Résistance: Interior Control Cable
First begin by removing the console bezel:
Carefully use a rag or a towel so you don't scratch anything up.
Pry off a bit so you can get your fingers under, then pull:
The clips will give fairly easily.
Remove the Climate Control unit:
There are four screws on both sides.
Now undo the interior cable at the passenger foot well:
Just pull it out of its clip and it'll pop out.
You can now pull out the Climate Control unit.
I bet you're glad you undid that cable! I was!
That is after I figured out it doesn't have enough slack to pull out and undo the harnesses.
Anyway, pull it out a bit and remove the harnesses so you can pull it out entirely.
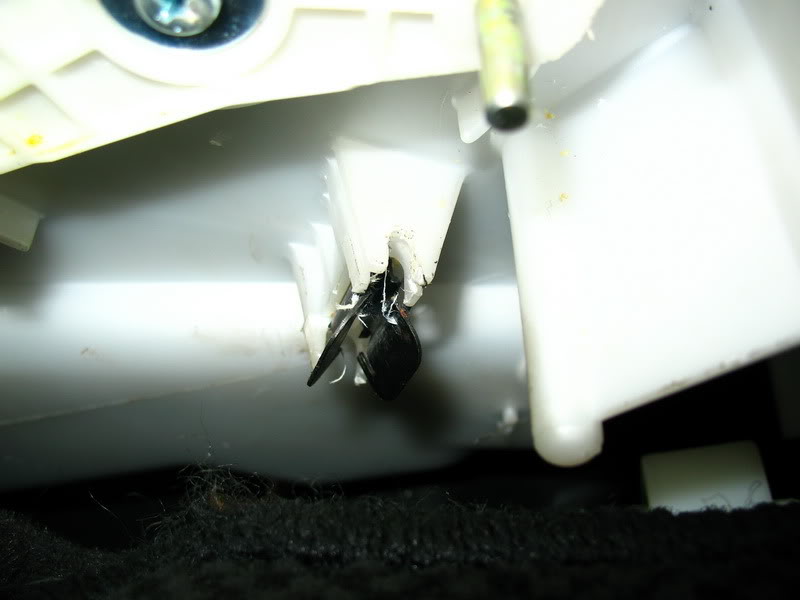
Look on the underside and you'll find the clip holding down the cable:
This is your culprit if the interior cable has become your evil fiend you cannot conquer.
There are one of few possibilities:
Your cable simply ripped itself out of the clip.
Your cable stripped some of the sheathing.
Your cable broke the clip. (No.3 here. Part#:39383-SA5-000)
Your cable broke the clip off.
Which calls for one of few solutions:
Unscrew the clip and stuff the cable back in.
Unscrew the clip, rotate the cable, and stuff it back in. (what happened to me).
Purchase said clip from a Honda dealer.
See if you can reattach the clip. If not, go have some fun with JB Weld. Or you might have to buy another heater control unit.
Two for Sunday: Exterior Cable, Water valve control.
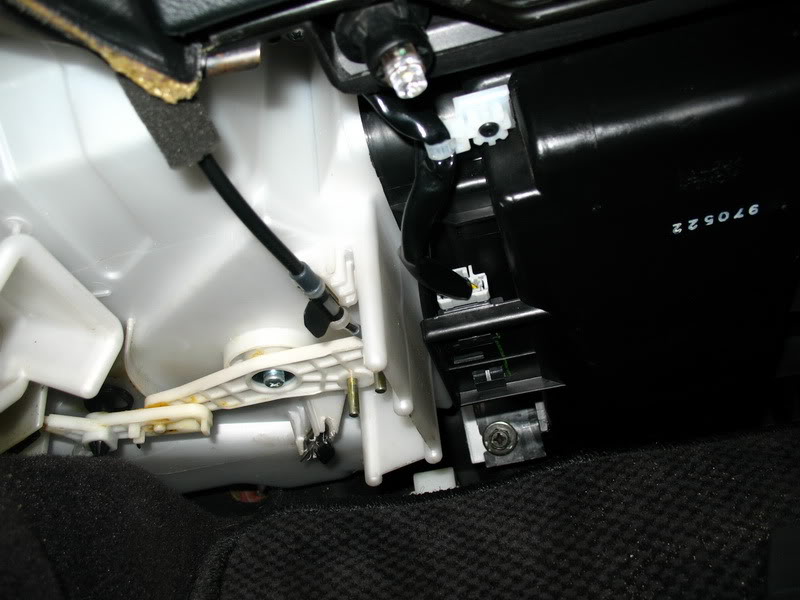
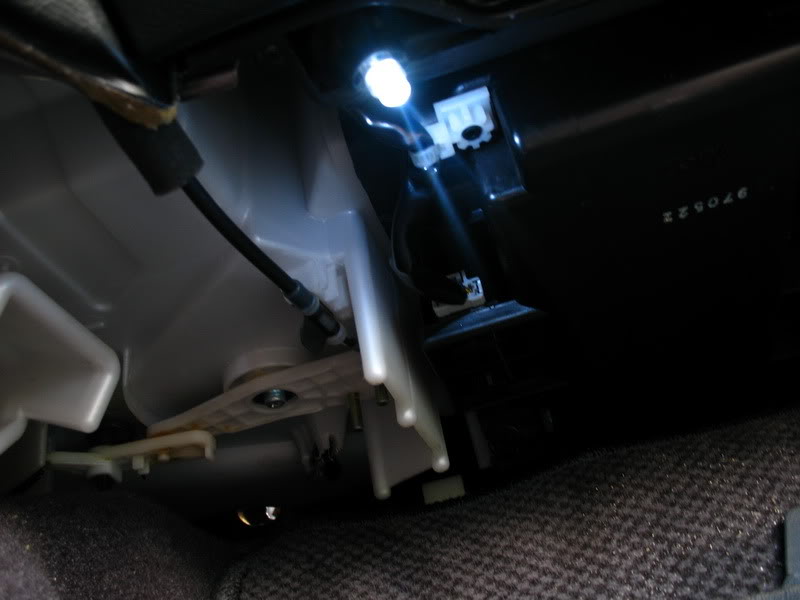
First you have to hang down upside down in the passenger footwell:
You'll see something along these lines.
I have a footwell light; it said hi to me. Nothing will say hi to you.
Locate the temperature control lever:
Look a little further down and the water valve control cable will sit in this clip. Pull it out. It will not want to come out. You want it to come out. Yell, scream, curse, and pull it out. You will yell, scream, and curse pulling it out.
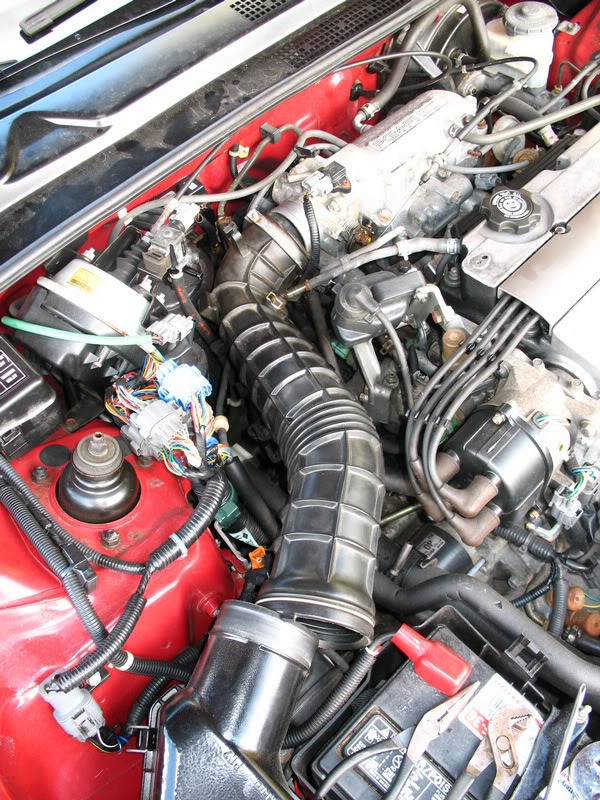
Pop the hood and get ready to look dirty like a real handy man:
You'll be working somewhere around here.
Go to the throttle body and undo the clamp:
That bolt is a 6mm bolt if you're a little ratchety from all the iced tea.
Undo the clamp holding this little hose to the TB:
Trust me, it'll just make things easier.
Pop off its other end and lay it aside:
Press down on the intake and the blow off from the intake to valve cover will just slide out:
I didn't even have to undo the clamp, it just slid out like a flaccid cock.
Also don't forget to pull off the intake tubing from the airbox. Kinda obvious, unless you're a daredevil and want to remove the airbox as well. Huzzah!
When you pull off the intake you'll have this tube hanging down:
This snaps into a couple hooks on the underside of the intake tube.
One of them is pictured here:
It's the hook directly above the metal ring-clamp.
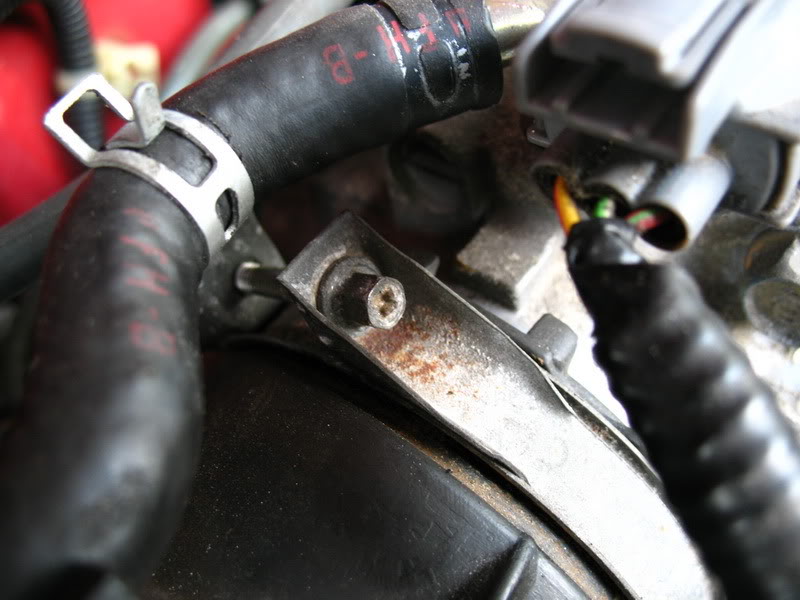
Pull out the intake tube and look down into this area:
You can just barely see the clip that holds the cable on the firewall side.
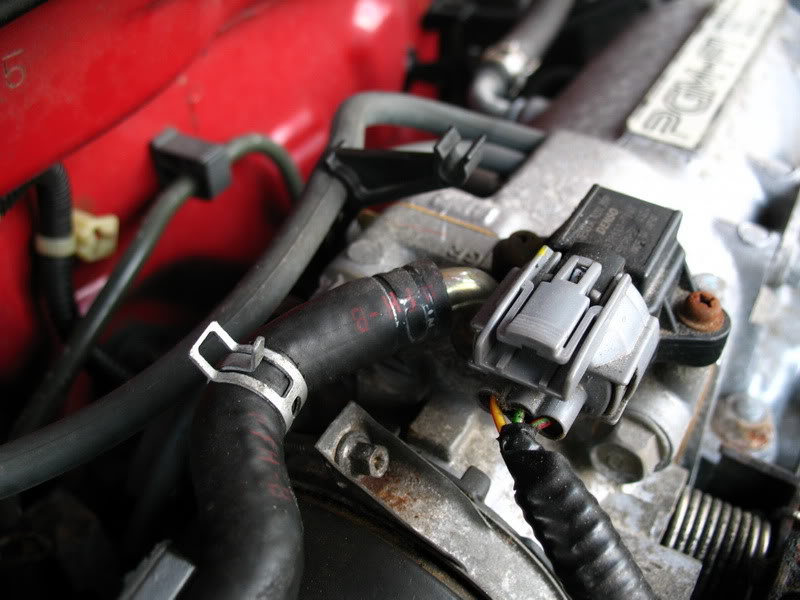
To make room, I moved this:
I know it's not clear, but it will be obvious. It's some bypass valve or solenoid thing. Whatever. It sits on rubber dampers so just slide it off and push it away.
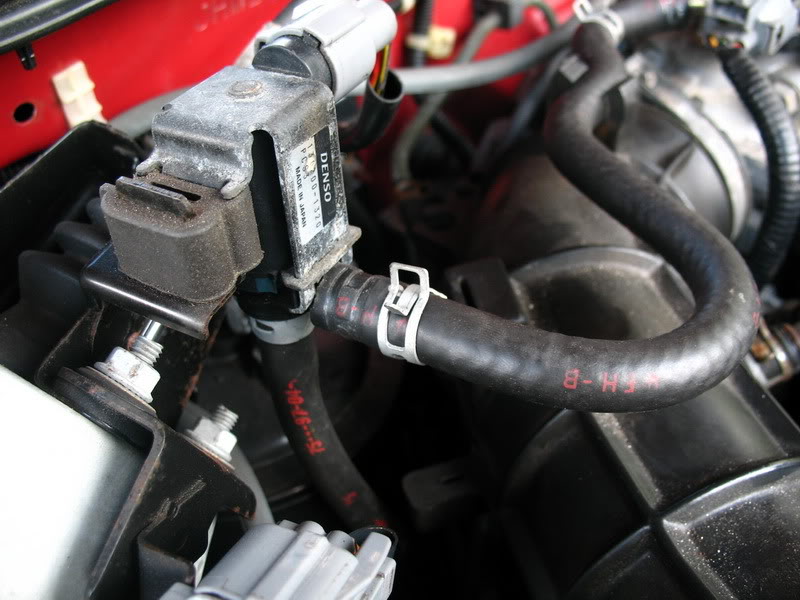
Anyway, look in the area and you'll find this:
It's the clamp that holds the water valve control cable to the bracket.
Just pull at it from below and it'll come off. A squirrel can figure this out.
This will free the cable and will allow you to remove it. Slide its head off the pole of the water valve lever and pull 'er out.
A little note about this picture ....
DO NOT remove the grommet. Unless you want to make your life miserable trying to get the fucking thing back onto the firewall, do not remove it.
I spent 30mins trying to get it so the firewall metal would be between the two ridges (which you can see in the above picture. Engine side ridge has rust on it, cabin side ridge is the smaller diameter thats a little rounded). So just hold down the grommet somehow and pull the cable through it.
Anyway, pull it out and feel free to show your emotions against it:
At this point our paths deviate. You can choose to be a sissy and get a new cable from Honda, which I guarantee will seize again within a year or two. Or you can be awesome like me and come up with a WIN solution that will last foreverz.
I am not a sissy plus I am impatient. The day after I did this I went to a junkyard with my friend and got a $2 fix (which involved some ingenuity). This bit of ingenious thinking requires the water valve control cable off an accord of the same years (civics apply as well).
Find said car and pull off said cable:
It will have end links that look like so:
See, fits perfectly! (on the preludes air/mix lever; inside of cabin)
Problem is, the cable off a 97-98 accord is too long:
Use some crafty skills hidden deep within your brain stem and shorten the NEW cable; mine were in my pockets. Line up the two then:
Snip off the end of the NEW cable with wire snips. (ONLY THE END)
Measure or match up the lengths of the rubber jacketing of both cables.
Cut the jacket on the new cable to the length of the old one.
Take the newly exposed cable and form it so it looks like the other end.
The easiest way to manipulate the end is to remove the air-mix control lever, hence why mine is on the table:
Wrap it around one of the poles and you'll get the perfect shape and size. Then just snip off the excess. Install is the reverse of most of this procedure. Just take your newfangled cable and stuff it back through the grommet.
Do things properly and perform a cable adjust procedure:
And for the curious...
The reason these cables seize is because how they are made. It is a cable that has another cable inside it. The inner cable is a length of thick steel wire, covered in a rubber jacket. This sits inside another cable, which is simple wrapped in a steel ribbon, which is covered by rubber.
The problem here is that since the outer cable is not a solid piece of metal and is a ribbon, there are air gaps between the ribbon windings. This means that air can get in here and cause the steel to rust. When the steel rusts it expands and squeezes the inner cable, seizing it.
The new cable I got is instead a thick gauge steel wire inside a thick PVC jacket. There is no cable within a cable bullshit, and there is no wound outer steel jacket exposed to rusting. So, there's nothing that can seize the inner cable.
On the left is a good portion of the OLD cable. On the right is a rusted part.
Three: Squeaky mice in a squeaky blower fan.
Your fan might be making a squealing noise as well.
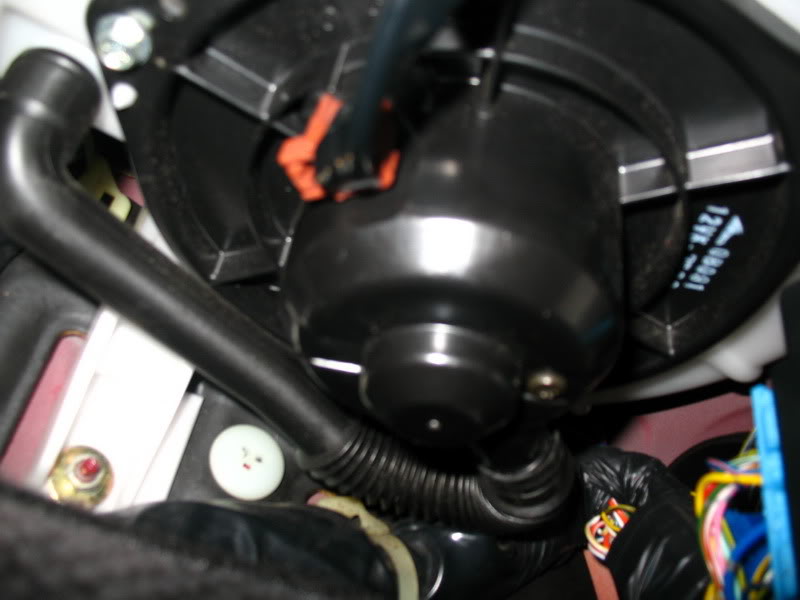
Start by stuffing yourself into the footwell and looking for this:
Unhook the black tube and orange harness:
THE BLACK TUBE IS IMPORTANT. It serves as the cooling duct for the motor. Do not forget it in the reassembly.
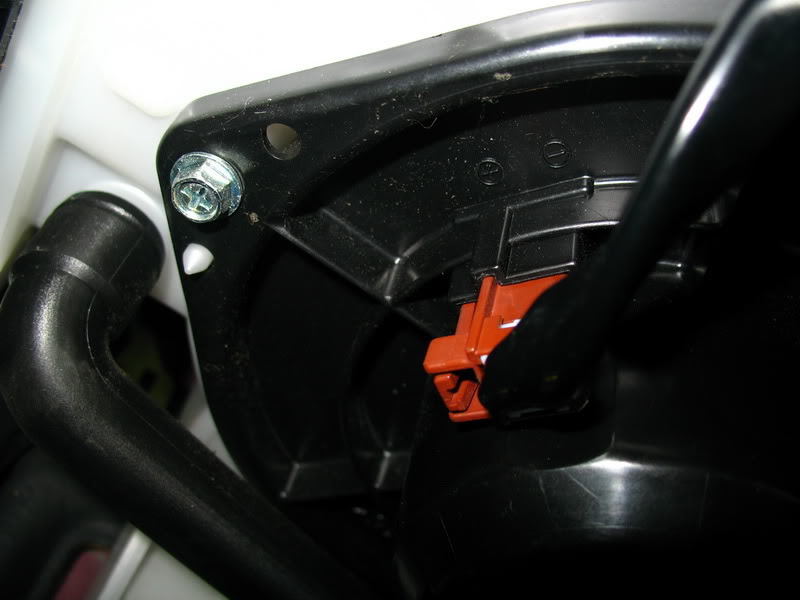
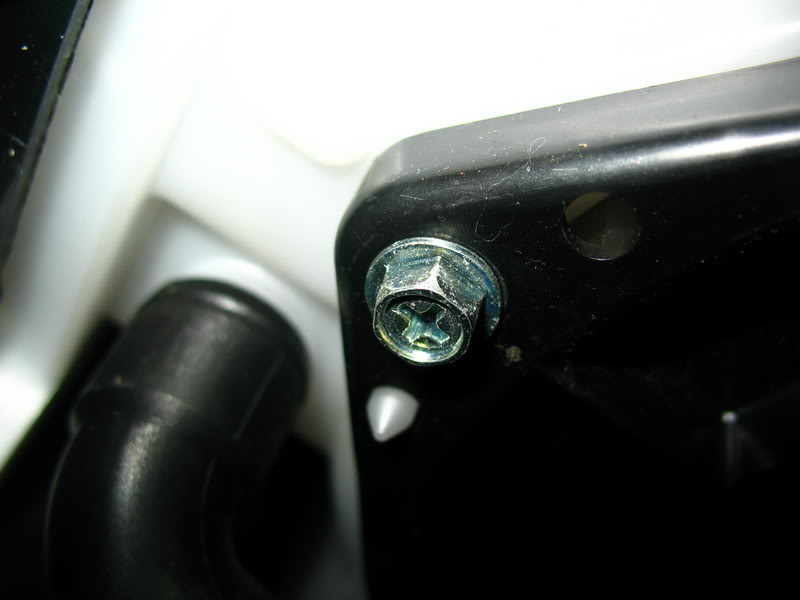
There are three bolts holding it up:
They are 8mm bolts with a slot for a Philips screw driver.
Once you remove all three, the motor will not just slide down. You'll have to play with it. You'll have to remove the black panel on the side and remove the black control box from the bracket, else the motor will not come out.
Once you have it out, vacuum out the cavity the motor was in. Wipe down if you like. Then vacuum the motor itself, again wipe if necessary.
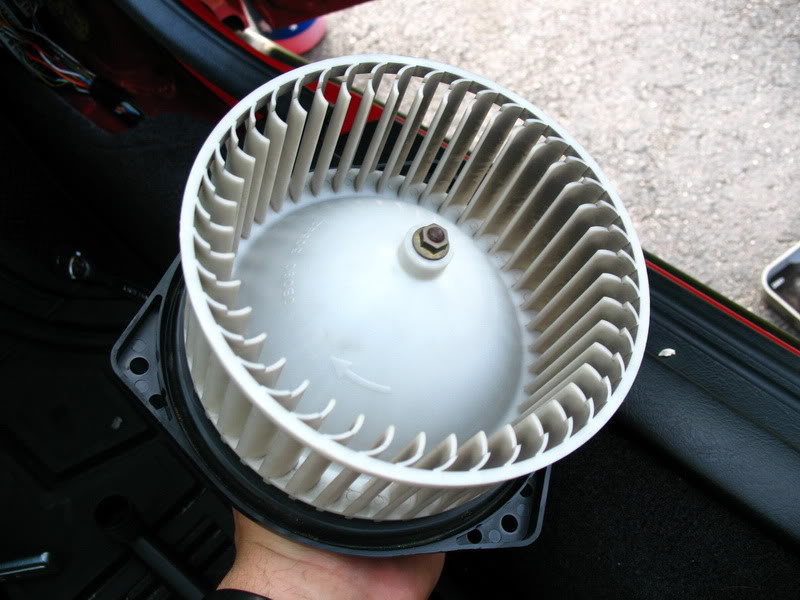
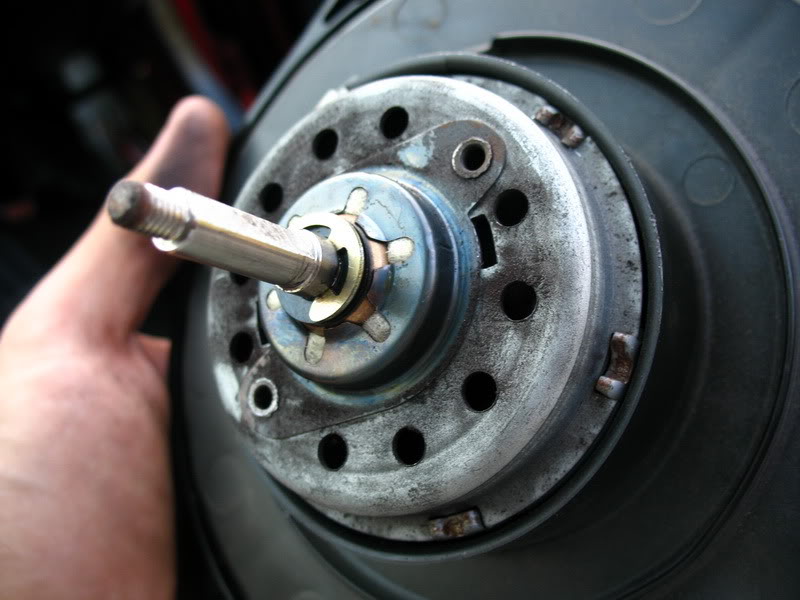
The main thing to do here is pull off the fan:
Remove that bolt and pull the fan off. Might be a tad difficult at first.
Here's the fan off:
Important part is to vacuum out the crud through the vent holes. Also use compressed air if you have a compressor. Blow out the crap that amassed inside it. Unless the thing decides to spit all over you:
Bastard.
FYI:
I also pulled out the motor itself. There is a small black screw on the underside of the housing holding the motor to it. I pulled it out enough (it's really stuffed into the housing!) I pried the face of the motor off in order to get into the motor housing itself. This I am not detailing because it is not a necessary stop. If you're curious, then by all means go for it. If you're like me and have some background of tinkering with crap like this, it won't take long to figure out how to pry the motor open.
I simply did this to check on the conductive pads/brushes. I wanted to see how worn down they are. Not knowing what you're doing or how to work on electric motors is a bad idea. You can break something (like I almost did) and cost yourself some big money. While it was open I lubricated the contact surface where the pads touch with some dielectric goop.

.
In a world full of copies, be an original.
.
Graphic Design: Indezyne | Rare Prelude Parts: InfamouzJDM